How to Set Up a Boom Pole?
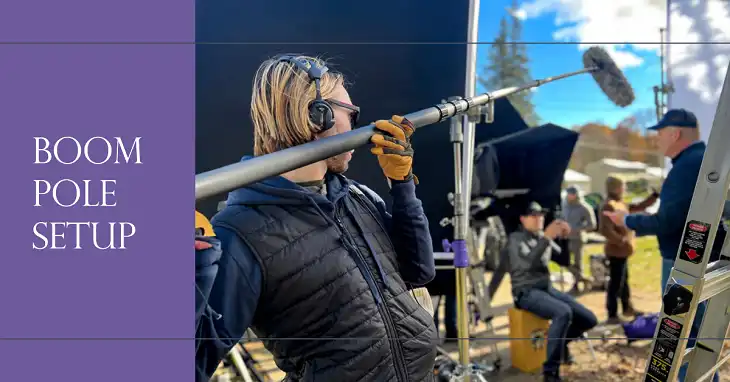
A boom pole is an essential tool in audio recording for film, video, and broadcast production. It’s a long, extendable pole used to position a microphone close to the sound source while keeping it out of the camera frame. Setting up a boom pole correctly is crucial for capturing high-quality audio.
In short, setting up a boom pole involves choosing the right equipment, properly mounting the microphone, managing cables, and positioning the pole for optimal sound capture while avoiding visual interference.
This guide will walk you through the entire process of setting up a boom pole, from selecting equipment to advanced techniques, ensuring you capture crystal-clear audio for your productions.
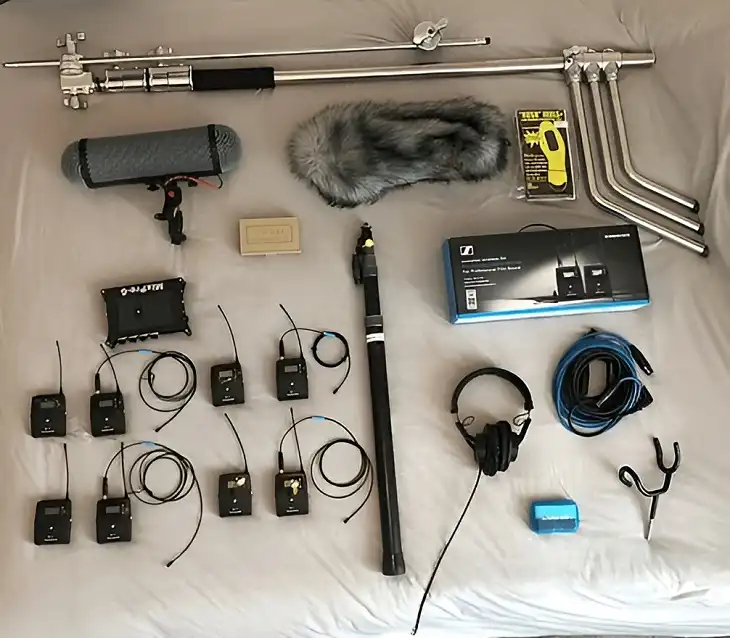
Essential Equipment for Setting Up a Boom Pole
Boom Pole
The boom pole itself is the foundation of your setup. When choosing a boom pole, consider the following factors:
- Types: Boom poles come in two main varieties: telescopic and fixed. Telescopic poles are more common due to their adjustable length, making them versatile for different shooting scenarios.
- Material: The most common materials are aluminum and carbon fiber. Carbon fiber is typically preferred for its lightweight and durable properties. For instance, a 9-foot carbon fiber boom pole might weigh around 1.5 pounds, while an aluminum pole of the same length could weigh 2.5 pounds or more.
- Length: Boom poles range from about 3 feet to over 20 feet when fully extended. Choose a length based on your typical shooting scenarios, keeping in mind that longer poles can be more challenging to maneuver.
- Cable Routing: Some boom poles offer internal cable routing, which provides a cleaner look and protects the cable. However, these are often more expensive and can be trickier to set up.
Microphone
The choice of microphone is crucial for capturing quality audio. Consider these points:
- Types: Shotgun microphones are most common for boom pole use due to their highly directional pickup pattern. Cardioid microphones can also be used, especially for indoor interviews.
- Compatibility: Ensure the microphone’s weight and mounting system are compatible with your boom pole and shock mount.
- Production Type: Choose a microphone suited to your production. For example, a short shotgun microphone like the Sennheiser MKH 416 is popular for indoor dialogue, while a longer shotgun like the Sennheiser MKH 8070 might be preferred for outdoor scenes with more ambient noise.
Cable
An XLR cable is typically used to connect the microphone to the recording device. Consider:
- Length: The cable should be slightly longer than your fully extended boom pole to allow for movement.
- Quality: Use a high-quality, low-noise cable to minimize interference. Brands like Mogami or Canare are well-regarded in the industry.
Accessories
- Shock Mount: This isolates the microphone from handling noise. Choose one compatible with your microphone model.
- Windscreen: Essential for outdoor recording. Options range from basic foam covers to more advanced “dead cat” or blimp-style windscreens for heavy wind conditions.
- Cable Clips: These secure the cable to the boom pole, preventing noise and tangling.
Preparing for Setup
Before setting up your boom pole, assess the recording environment:
- Safety: Check for overhead obstacles and power lines, especially when using longer boom poles.
- Location: Choose a spot that minimizes background noise and provides shelter from wind if possible.
- Proximity: Position yourself close enough to capture clear audio without entering the camera frame.
Step-by-Step Setup Instructions for Setting Up Boom Pole
Extending the Boom Pole
- Start with the pole fully collapsed.
- Extend each section, beginning from the thickest part.
- Twist or lock each section securely to prevent collapse during use.
Mounting the Microphone
- Attach the shock mount to the end of the boom pole, ensuring it’s securely fastened.
- Place the microphone in the shock mount, orienting it correctly (shotgun mics should point directly at the sound source).
- Secure the microphone in the mount using the provided clips or bands.
Installing Wind Protection
- If using a foam windscreen, simply slide it over the microphone.
- For furry windscreens or blimps, follow the manufacturer’s instructions for proper installation.
- Pro Tip: Apply a small piece of camera tape to the tip of the windscreen to further reduce wind noise.
Cable Management
- Connect the XLR cable to the microphone.
- If your boom pole has internal cable routing, thread the cable through the pole.
- For external routing, use cable clips to secure the cable along the length of the pole.
- Leave some slack at the microphone end to allow for movement.
- Connect the other end of the cable to your recording device or wireless transmitter.
How to Position and Operate the Boom Pole
Proper technique is crucial for effective boom pole operation:
- Grip: Hold the boom pole with both hands, one near the base and one further up for balance.
- Balance: Use your body weight to counterbalance the pole. For very long poles, a support harness can help distribute the weight.
- Positioning: Keep the microphone just out of the camera frame, typically above the actors’ heads for dialogue scenes.
- Movement: Follow the action smoothly, keeping the microphone aimed at the sound source.
- Avoid Shadows: Be aware of lighting to prevent casting boom shadows in the frame.
Testing and Adjustments
Before recording:
- Perform a sound check, listening through headphones for any issues.
- Adjust microphone placement for optimal sound quality.
- Check for any handling noise or cable interference.
Best Practices for Using Boom Pole in Different Scenarios
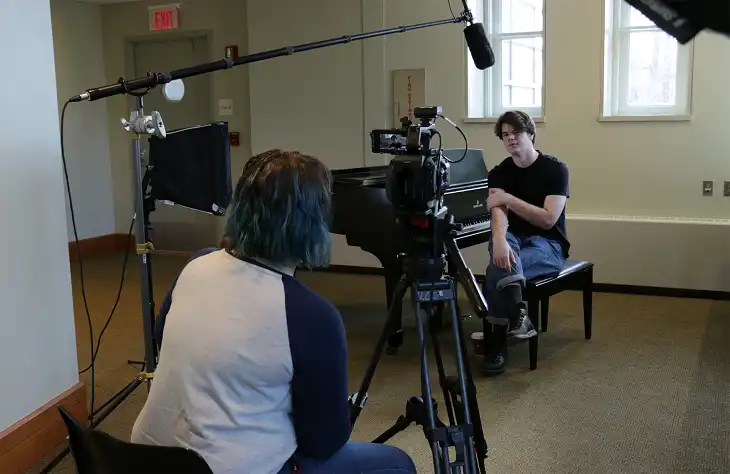
Interviews
- Use a cardioid microphone for a more focused pickup pattern.
- Position the microphone slightly above and angled down towards the speaker’s mouth.
Documentaries
- Opt for a shotgun microphone to capture sound from a distance when necessary.
- Be prepared to quickly adjust positioning for unpredictable scenes.
Film Sets
- Coordinate closely with the camera operator to avoid entering the frame.
- Be aware of actors’ movements and adjust accordingly.
Troubleshooting Common Boom Pole Issues
- Unwanted Noise: Identify and mitigate environmental sound sources. Ensure all connections are secure.
- Microphone Interference: Keep the boom pole away from sources of electrical interference like lights or generators.
- Boom Pole Instability: Shorten the pole or add weight to the base for better balance.
- Wind Noise: Use appropriate wind protection and seek sheltered locations when possible.
Wrapping Up
Setting up a boom pole correctly is a crucial skill for capturing high-quality audio in film and video production. By choosing the right equipment, mastering proper technique, and understanding how to adapt to different scenarios, you’ll be well on your way to recording professional-grade sound.
Remember, practice is key to becoming proficient with a boom pole. Experiment with different setups and techniques to find what works best for your specific needs.