How to Fix Back Focus in Lens | Easy Methods
Sharp focus is the cornerstone of capturing stunning images. However, even the most expensive lenses can sometimes suffer from a frustrating issue called “back focus.” Back focus occurs when the point of sharpest focus falls behind the intended subject, resulting in a blurred subject and sharp background. This problem can ruin otherwise fantastic shots and leave photographers scratching their heads. Fortunately, there are ways to diagnose and fix back focus issues, ensuring your lens performs at its best.
Unlike front focus, where the sharpest point is in front of the subject, back focus is often trickier to identify. Signs of back focus include consistently soft or blurred subjects, even when the camera’s focus point appears to be properly placed. Backgrounds may appear sharp while the intended subject remains frustratingly out of focus.
Now let’s take a look at how to diagnose and fix this back focus issue.

Diagnosing Back Focus
Before attempting to fix back focus, it’s essential to confirm its presence. This process involves setting up a controlled testing environment and analyzing the results carefully.
Setting up the test:
- Use a sturdy tripod to eliminate the camera shake.
- Select a high-contrast focus target, such as a printed focus chart or a textured surface with distinct details.
- Set your camera to its smallest aperture (e.g., f/16 or f/22) for maximum depth of field.
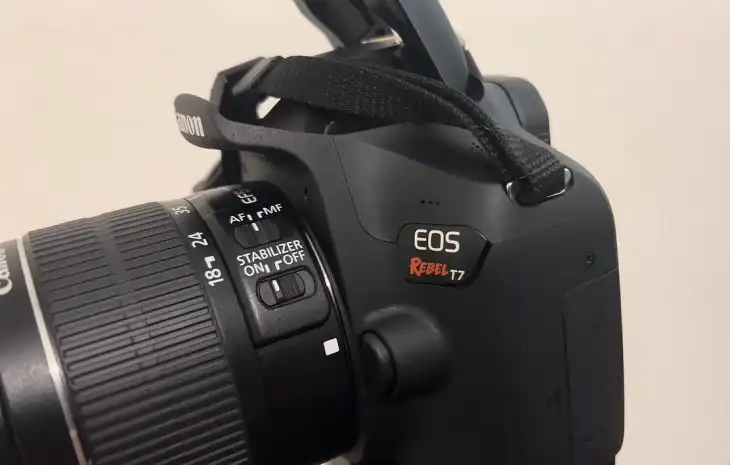
- Switch to manual focus mode to avoid any autofocus interference.
- Take multiple test shots at different focal lengths, ensuring the focus point is precisely on the target.
Analyzing the results:
- Review the test images on a large screen or monitor.
- Identify the sharpest point of focus in each image.
- If the sharpest area consistently falls behind the intended focus point, you likely have a back focus issue.
- Repeat the test to confirm the pattern and rule out any potential user error or environmental factors.
Advanced diagnosis
For more comprehensive testing, try focus bracketing. This technique involves taking a sequence of shots with slightly different focus points, allowing you to see the entire focus range and pinpoint the exact back focus issue.
Fixing Back Focus
Before attempting any internal adjustments, it’s crucial to understand the risks involved. Some fixes may void your lens or camera’s warranty, so proceed with caution, especially if you’re not comfortable working with delicate equipment.
Autofocus Fine-Tune (DSLRs)
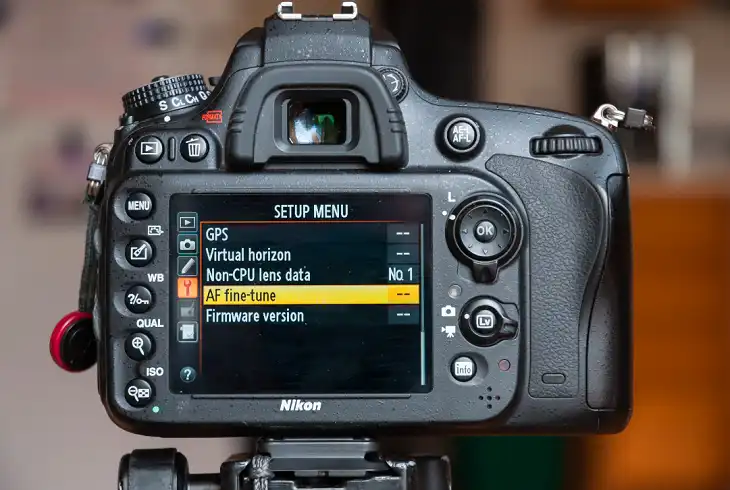
Many modern DSLR cameras offer an autofocus micro-adjustment feature, which can help compensate for back focus issues. Here’s how you do it:
- Select a high-contrast focus target and set up your camera on a sturdy tripod, as described in the “Diagnosing Back Focus” section.
- Access the autofocus micro-adjustment menu on your camera. The location of this menu can vary, so consult your camera’s manual for specifics. It may be found under custom settings, autofocus settings, or a dedicated AF fine-tune menu.
- Select the lens you want to calibrate. Some cameras allow you to store adjustments for multiple lenses, while others require you to calibrate each lens individually.
- Take a series of test shots at different focus distances, ensuring the focus point is precisely on the target. Review the images carefully to determine if the focus is front-focused or back-focused.
- In the autofocus micro-adjustment menu, input a positive value (e.g., +5, +10) to adjust for back focus, or a negative value (e.g., -5, -10) to adjust for front focus. The exact values will depend on the severity of the issue and may require some trial and error.
- Take another set of test shots and review the results. If the focus is still not perfect, repeat step 5 and adjust the value until the focus is accurately hitting the intended point.
- Once you’ve dialed in the correct adjustment value, save the setting for that specific lens.
Pro Tips:
- Start with small adjustment increments (e.g., +/-2 or +/-5) and work your way up or down as needed.
- Perform the calibration under consistent lighting conditions and at the aperture you commonly use for that lens.
- Consider calibrating at multiple focus distances if back focus seems to vary significantly.
- Reset the adjustment to zero before calibrating a new lens or after changing lenses.
It’s important to note that the autofocus fine-tune feature is designed to compensate for minor focus discrepancies and may not be sufficient for severe back focus issues. In such cases, manual adjustments or professional calibration services may be required.
Manual Back Focus Adjustment (Advanced)
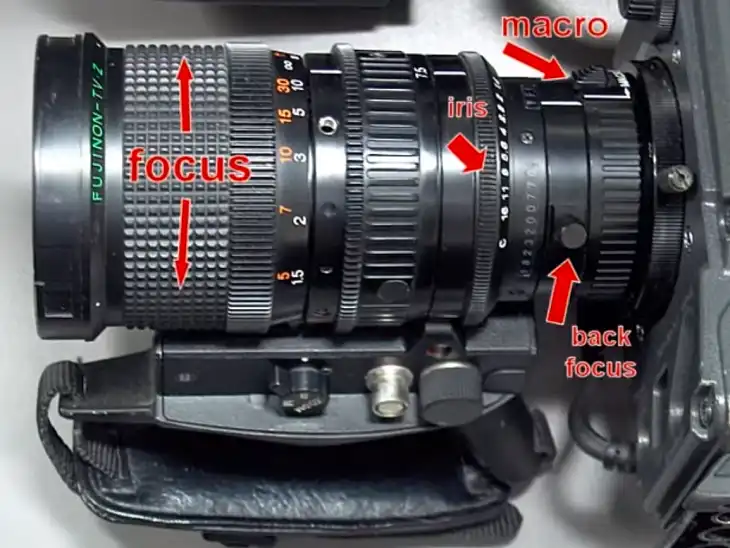
For more hands-on users, physically adjusting the lens mount or back focus ring (if present) may be an option. However, this process should only be attempted if you’re comfortable working with intricate camera components and have the proper tools.
- Locate the back focus adjustment ring or set screws on your lens mount.
- Follow the manufacturer’s instructions carefully, if available.
- Make small adjustments and take test shots after each change.
- Keep detailed notes of your adjustments for future reference.
- Exercise caution and avoid forcing any components to prevent damage.
If the back focus issue persists or you’re uncomfortable with manual adjustments, consider sending your lens to a professional calibration service, especially for high-end equipment.
Alternatives to Fixing Back Focus
If fixing back focus isn’t an option or the issue is minor, there are alternative methods to help mitigate the problem:
Use focus confirmation tools: Many cameras offer focus peaking or magnified live view modes, which can assist in manually achieving precise focus.
Try focus bracketing: Capture a sequence of images with slightly different focus points to increase the chances of getting a sharp shot.
Calibrate at different distances: Back focus can vary depending on the focus distance, so consider calibrating your lens at multiple distances if possible.
Regular cleaning and maintenance: Keep your lens contacts and camera mount clean to prevent focusing issues caused by debris or corrosion.
Consistency is key when diagnosing and fixing back focus. It’s also essential to practice proper focusing techniques, such as using single-point autofocus, recomposing after focusing and avoiding focus-and-reframe methods that can introduce focus errors.
Sum Up
Back focus can be a frustrating issue, but with the right approach and techniques, it’s possible to identify and mitigate the problem. By setting up a controlled testing environment, analyzing the results carefully, and exploring various fixing methods, you can restore your lens’s focusing accuracy and capture sharp, stunning images.
Remember, not all back focus issues are fixable through DIY methods, and attempting internal adjustments may void your warranty. In such cases, consulting a professional repair service is recommended, especially for high-end equipment.
With patience, practice, and a commitment to proper focusing techniques, you can overcome back focus and take your photography to new heights.
Frequently Asked Questions
Can back focus vary depending on the subject distance?
Yes, back focus can sometimes be more prominent at certain focus distances. If you notice inconsistent back focus behavior at different subject distances, consider calibrating your lens at multiple focal lengths or distances.
Is back focus more common in certain types of lenses?
Back focus can occur in any lens, but it may be more noticeable in lenses with longer focal lengths or wider apertures, where depth of field is shallow, and focus accuracy is critical.
Can environmental factors like temperature or humidity affect back focus?
Environmental conditions can potentially impact back focus, as temperature changes and humidity can cause slight shifts in the lens or camera body components. It’s essential to diagnose and calibrate your equipment in controlled, stable environments.
Can back focus be fixed in post-processing software?
While post-processing software can sometimes help sharpen images or adjust focus slightly, it’s generally not an effective solution for severe back focus issues. Fixing the problem at the source (lens or camera) is the best approach for optimal results.