How to Adjust F-Stop on Nikon Cameras | A Beginner’s Guide
The f-stop, or aperture, is one of the most important settings on a camera, especially for photographers looking to control depth of field, exposure, and the creative quality of their images.
On Nikon cameras, adjusting the f-stop involves understanding how aperture works and how it interacts with other settings like ISO and shutter speed. This guide will walk you through what an f-stop is, how it works, and how to adjust it on various Nikon models like the D3200 and D3500.
What is the F-Stop on a Nikon Lens?
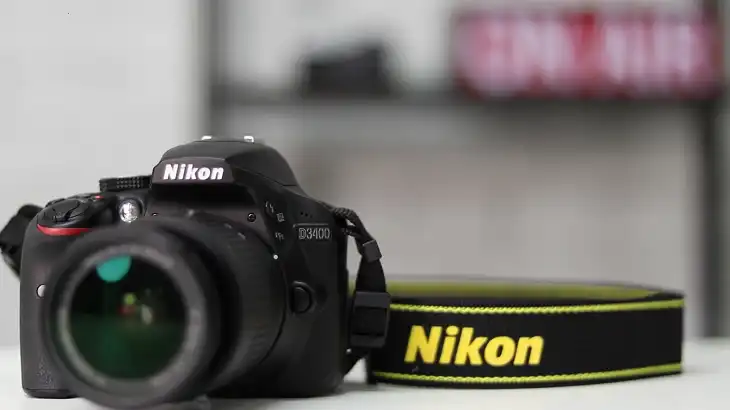
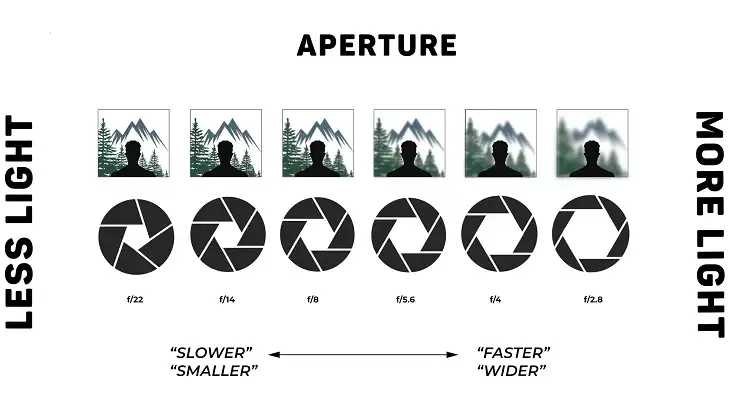
The f-stop refers to the aperture setting on your camera, which controls how much light enters the lens and hits the camera sensor. It is represented by numbers such as f/1.8, f/2.8, or f/16, with each number indicating the size of the lens opening.
A lower f-stop number corresponds to a wider aperture, allowing more light to pass through, while a higher f-stop means a narrower aperture that lets in less light.
How is F-Stop Calculated?
F-stop is calculated using the formula:
fnumber=focal length of the lensdiameter of the aperture
For example, if you are using a 50mm lens and the diameter of the aperture is 25mm, the f-stop will be:
f2=5025
This means the wider the aperture, the smaller the f-stop number, and vice versa.
Is Lower F-Stop Better?
Whether a lower f-stop is better depends on the type of photography:
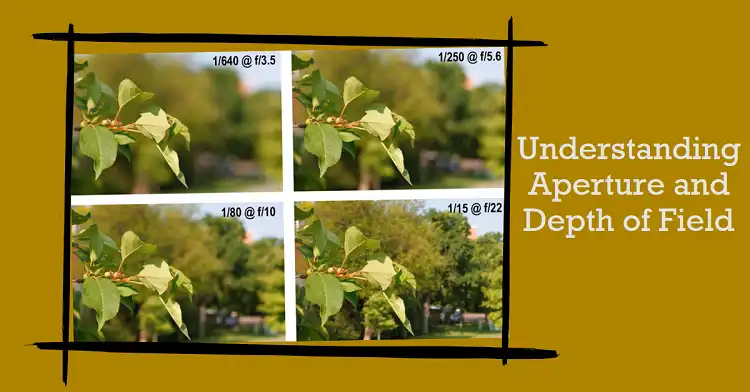
Low f-stop (e.g., f/1.8, f/2.8): Ideal for low-light conditions and achieving a shallow depth of field, where the subject is sharp, but the background is beautifully blurred (bokeh effect). This is perfect for portraits or close-ups.
High f-stop (e.g., f/11, f/16): Useful for landscapes or group photos where you want everything in the frame to be in focus.
Choosing the right f-stop depends on your creative goals and the lighting conditions.

How Do I Change the F-Stop on My Nikon?
Adjusting the f-stop on a Nikon camera varies depending on whether you’re in manual (M), aperture-priority (A), or other shooting modes.
Steps to Adjust F-Stop:
- Set the Camera Mode: Switch the mode dial to M (Manual) or A (Aperture Priority). In manual mode, you control both the aperture and shutter speed, while in aperture-priority, the camera selects the shutter speed for you.
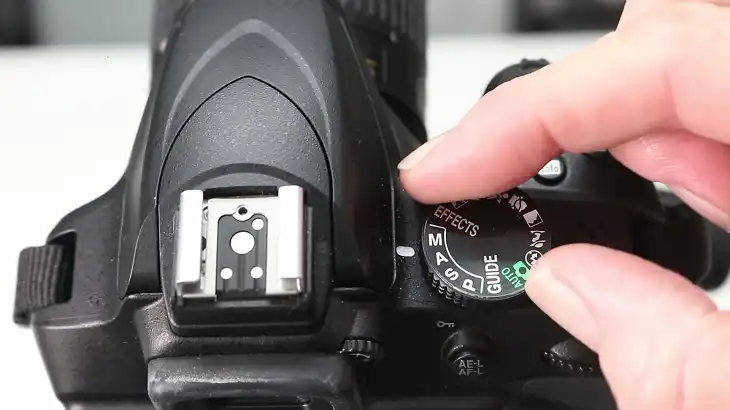
- Use the Command Dial: Rotate the main command dial, typically located near the shutter button, to adjust the f-stop.
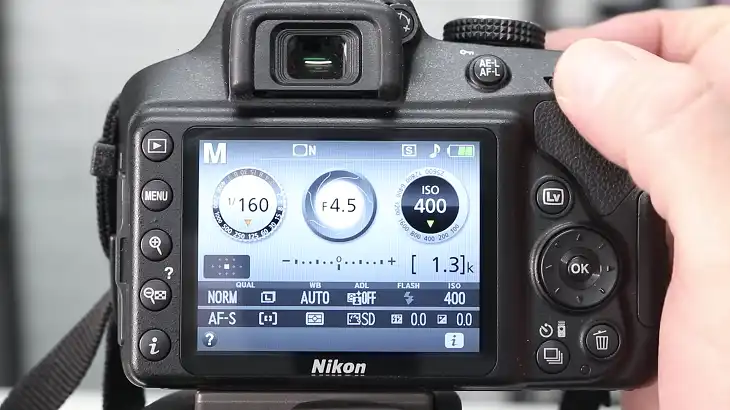
- Check the Viewfinder or LCD Screen: The f-stop value is displayed in the viewfinder or on the screen as you turn the dial.
Lens Considerations:
If you’re using a lens with a manual aperture ring, you can adjust the f-stop directly on the lens by turning the ring. However, modern Nikon lenses often lack this feature, relying on the camera’s controls instead.
How to Set the F-Stop on a Nikon D3200 and D3500?
Both the Nikon D3500 and the D3200 feature a similar layout that follows a similar process to change the aperture. Here’s how:
- Select the Shooting Mode: Turn the mode dial to M (Manual) or A (Aperture Priority).
- Use the Command Dial:
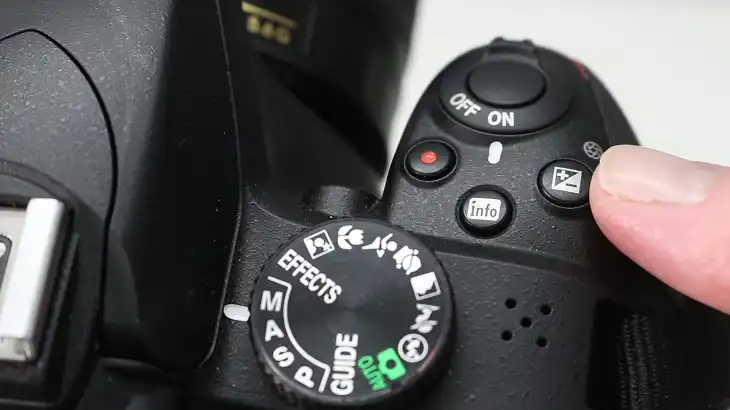
- In M mode, press and hold the Exposure Compensation (+/-) button located near the shutter release, then rotate the command dial to change the f-stop.
- In A mode, simply rotate the command dial to adjust the aperture.
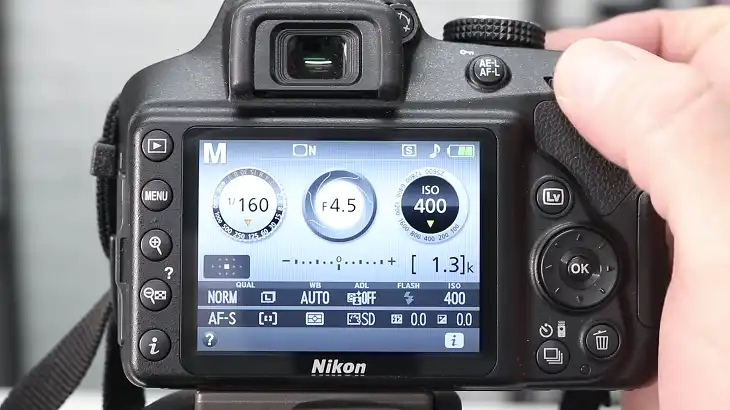
- Review Your Settings: The updated f-stop value will appear on the screen or in the viewfinder.
Expert Tips for Adjusting F-Stop on Your Nikon
Mastering the f-stop requires understanding how it affects exposure, depth of field, and creative focus. Here are some concise but impactful tips:
1. Balance the Exposure Triangle
Adjusting the f-stop changes light intake, so balance it with shutter speed and ISO. For wide apertures (low f-stops), lower ISO or increase shutter speed to avoid overexposure. For narrow apertures (high f-stops), increase ISO or slow down the shutter.
2. Control Depth of Field
Shallow Depth of Field: Use low f-stops (e.g., f/1.8) for blurred backgrounds, ideal for portraits or isolating subjects.
Deep Depth of Field: Use high f-stops (e.g., f/11) for sharpness across the frame, great for landscapes or group shots.
3. Optimize Lens Performance
Every lens has a “sweet spot,” typically between f/5.6 and f/8, where sharpness peaks. Experiment with your lens to find its optimal aperture.
4. Use Aperture Priority Mode
Aperture Priority (A) mode lets you adjust the f-stop while the camera handles shutter speed. It’s perfect for learning how aperture affects depth of field and exposure.
5. Preview Depth of Field
Use the DOF Preview Button (if available) to see how your selected f-stop impacts focus and background blur before taking the shot.
6. Add ND Filters for Bright Conditions
Neutral density filters let you shoot with wide apertures in bright light without overexposure, ideal for outdoor portraits with shallow depth of field.
By practicing these techniques, you’ll gain precise control over the f-stop, transforming how you approach lighting, focus, and creative composition.
Frequently Asked Questions
Is f4 Good for Portraits?
Yes, f/4 is great for portraits, especially in well-lit conditions. It provides a balance between sharpness and background blur. If you want more pronounced bokeh, opt for a lower f-stop like f/1.8 or f/2.8.
What is AF in Nikon?
AF stands for autofocus, a camera function that automatically adjusts the lens to focus on the subject. Nikon cameras offer different AF modes like AF-S (single-servo for still subjects) and AF-C (continuous-servo for moving subjects).
How to Adjust ISO on Nikon?
Press the ISO button (on newer models) or access the ISO option in the menu. Use the command dial to set the desired ISO value. For beginners, enabling Auto ISO allows the camera to adjust ISO automatically based on lighting conditions.
Conclusion
Understanding how to adjust the f-stop on your Nikon camera gives you more creative control over your photos, whether you’re aiming for stunning portraits or sharp landscape shots. By mastering these techniques and pairing them with adjustments to ISO, shutter speed, and focus modes, you can elevate your photography to the next level.

