How to Use Speedlight with Softbox?
While natural light can be beautiful, it’s not always available or sufficient for the shot you want to capture. This is where artificial lighting comes in, and one of the most versatile tools in a photographer’s arsenal is the combination of a speedlight and softbox.
A speedlight, also known as a flashgun, is a portable flash unit that can be mounted on your camera or used off-camera. When paired with a softbox, which is a light modifier that diffuses and softens the light, you can create stunning, professional-looking images in virtually any setting.
This article will explain how to use a speedlight with a softbox while covering various setup techniques. Let’s begin.
What’s a Speedlight and What are Its Features
Before we dive into the specifics of using a speedlight with a softbox, let’s take a closer look at speedlights themselves.
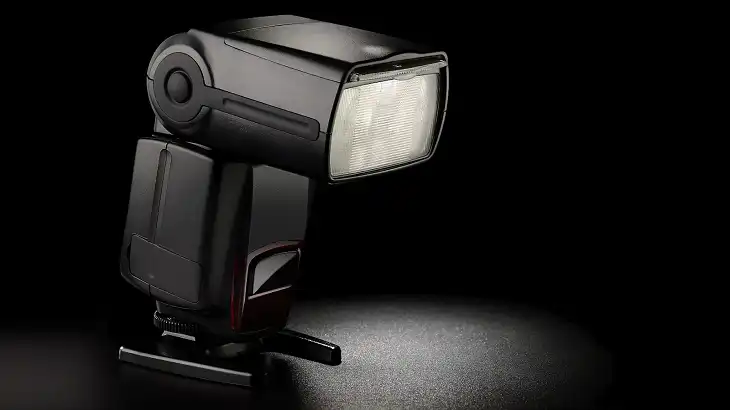
A speedlight is a compact, portable flash unit that typically runs on batteries. Unlike studio strobes, which are larger and often require a power outlet, speedlights can be easily carried in your camera bag and used on location. They’re versatile enough to be mounted directly on your camera’s hot shoe or used off-camera for more creative lighting setups.
Modern speedlights come with a range of features, including:
- Adjustable power output: Most speedlights allow you to adjust the flash power from full power (1/1) down to very low power (e.g., 1/128), giving you precise control over your lighting.
- Zoom capability: The flash head can zoom in and out to match different lens focal lengths, typically ranging from 24mm to 200mm.
- Tilt and swivel head: This allows you to bounce the flash off walls or ceilings for softer light.
- TTL (Through The Lens) metering: Many speedlights can communicate with your camera to automatically adjust flash output for correct exposure.
- High-speed sync: This feature allows you to use flash at higher shutter speeds, which is useful for outdoor portraits or action shots.
When choosing a speedlight, consider factors like power output (measured in Guide Number), recycle time (how quickly it can fire again after a full-power flash), and compatibility with your camera system. Popular models include the Canon 600EX II-RT, Nikon SB-5000, and Godox V1, with prices ranging from $200 to $600 for brand-name units and $100 to $300 for third-party options.
What’s a Softboxand What are Its Features
A softbox is a light modifier that diffuses and softens the harsh light from a flash, creating a more flattering and natural-looking illumination. It works by spreading the light over a larger surface area and often includes one or more layers of diffusion material.
Softboxes come in various shapes and sizes, each with its own characteristics:
- Square or rectangular: These are versatile and create a natural-looking window light effect. Sizes typically range from 16″ x 16″ to 54″ x 72″.
- Octagonal (or octabox): These produce a softer light with more pleasing circular catchlights in the subject’s eyes. Common sizes are 24″, 36″, and 48″ in diameter.
- Strip boxes: Long and narrow, these are great for creating a slice of light or illuminating full-length portraits. Typical sizes are 10″ x 36″ or 14″ x 48″.
When choosing a softbox size, remember that larger softboxes produce softer light but are less portable. A good starting point for portraits is a 24″ x 24″ or 24″ octabox, which balances softness and portability.
Setting Up Your Speedlight and Softbox
Assemble the softbox
Setting up your speedlight with a softbox is a straightforward process that requires attention to detail. Begin by assembling the softbox according to the manufacturer’s instructions, carefully attaching the diffusion panels to the frame.
Attach the speedlight bracket
Next, securely connect the speedlight bracket to your flash unit. Most setups utilize a Bowens mount or similar system to attach the speedlight and bracket combination to the softbox. Once assembled, extend your light stand to the desired height, ensuring it’s stable and can support the weight.
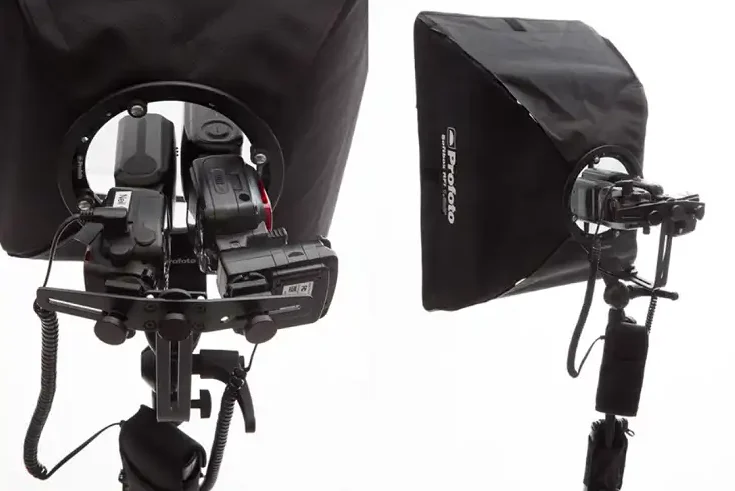
Mount the speedlight to the softbox
Carefully mount the softbox and speedlight assembly onto the light stand. If you’re using wireless triggers for off-camera flash, attach the receiver to your speedlight and the transmitter to your camera’s hot shoe. Finally, power on your equipment and perform a test fire to confirm everything is functioning correctly.
This setup process typically takes about 5-10 minutes, depending on your familiarity with the equipment.
Camera Settings for Speedlight with Softbox
Shooting mode & Aperture
To optimize your speedlight and softbox setup, fine-tune your camera settings for the best results. Start by switching to manual mode for maximum control over your exposure. Set your aperture to f/5.6 or f/8, striking a balance between depth of field and image sharpness.
Shutter Speed
For shutter speed, begin with your camera’s sync speed (usually 1/200s or 1/250s), but don’t hesitate to go slower if you want more ambient light in your shot. Keep your ISO low, around 100, to minimize noise, adjusting as needed for different lighting conditions.
White Balance
Set your white balance to “Flash” or use a custom setting for accurate color reproduction. When it comes to flash mode, manual offers consistent output, while TTL provides automatic adjustments.
Remember, these settings are just a starting point – you’ll need to fine-tune them based on your specific shooting environment and creative vision. Experimentation is key to finding the perfect balance for your unique photographic style.
Positioning and Light Control
Front lighting
The positioning of your softbox in relation to your subject is a crucial factor in shaping the mood and quality of your images. Front lighting, positioned at 0-45 degrees, produces a flattering, even illumination with minimal shadows, making it ideal for headshots and product photography.
Side & Top Lighting
Top lighting, where the softbox is placed above the subject, can create dramatic shadows under the eyes, nose, and chin. While this can be striking, it requires careful application and may benefit from additional fill light to soften harsh shadows. Backlighting, with the softbox behind the subject, is excellent for creating rim lighting or silhouettes.
Distance
Distance also plays a vital role in light quality. Placing the softbox closer to your subject produces softer light with a more rapid fall-off while increasing the distance results in harder light that covers a larger area.
Zoom Settings
For even more control, adjust your speedlight’s zoom setting. A wider zoom setting distributes light more evenly across the softbox, resulting in softer overall illumination. Conversely, a tighter zoom concentrates light in the center of the softbox, producing a slightly harder effect with more directionality.
Advanced Softboxing Techniques
Feathering
As you grow more confident with your speedlight and softbox setup, incorporating advanced techniques can elevate your photography to new heights. One such technique is feathering, where you angle the softbox so that the edge of the light falls on your subject. This creates a softer gradation of light, resulting in a more nuanced and flattering illumination.
Using Grids
Adding a grid to your softbox is another powerful technique. Grids help create more directional light by focusing the beam and controlling light spill. This allows for precise lighting control, perfect for dramatic portraits.
Multiple Light Setups
For more complex lighting scenarios, consider using multiple light setups. Combining your softbox with additional speedlights or other modifiers opens up a world of creative possibilities. You might use a softbox as your main light, a bare speedlight for accent lighting, and a reflector for fill. This approach allows you to sculpt light with precision.
High-Speed Sync
Lastly, don’t overlook the power of high-speed sync. This feature allows you to use flash at shutter speeds faster than your camera’s normal sync speed (typically 1/200s or 1/250s). It’s invaluable when shooting outdoors in bright conditions.
These advanced techniques require practice to master, but they offer tremendous creative control. As you experiment, you’ll discover how each technique can be tailored to your unique photographic style, allowing you to create images that truly stand out.