Can You Attach a Boom Pole to a Tripod?
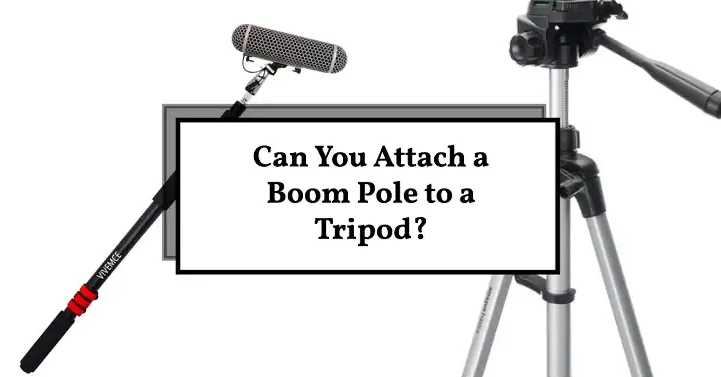
In the world of audio recording, having the right tools can make a significant difference in capturing high-quality sound. Two essential pieces of equipment are boom poles and tripods. Boom poles are telescoping poles that allow you to extend a microphone closer to the sound source, while tripods provide a stable base for cameras and other equipment. But what if you want to combine these two tools? Can you attach a boom pole to a tripod?
Yes, you can attach a boom pole to a tripod. And it offers several benefits as well, which we’ll discuss below, along with how to attach a boom pole to a tripod.
How to Attach a Boom Pole to a Tripod
- Built-in Tripod Mount
Some higher-end boom poles come with a built-in tripod mount at the base, providing the simplest and most secure method for attachment. These poles typically have a screw thread that allows for direct connection to the tripod’s mounting plate or head.
To attach a boom pole with a built-in tripod mount, follow these steps:
- Set up your tripod and extend the legs to the desired height.
- Remove the tripod’s mounting plate or head by unscrewing it from the center column.
- Locate the screw thread on the base of the boom pole and align it with the tripod’s mounting screw.
- Carefully thread the boom pole onto the tripod’s mounting screw, tightening it securely.
- Adjust the boom pole’s length and position as needed for your recording setup.
- Boom Pole Adapters
Boom pole adapters are popular and versatile solutions for connecting a boom pole to a tripod. These adapters come in different types to accommodate various equipment configurations.
2. Screw Adapters (3/8″ to 5/8″)
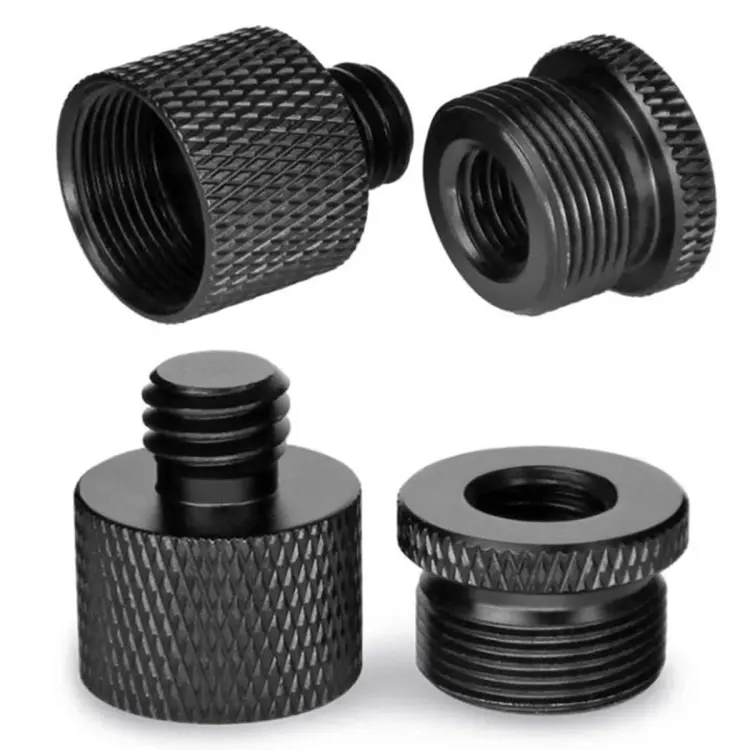 Screw adapters are the most common type of boom pole adapter. They convert the screw size of the boom pole to match the tripod’s mounting screw. These adapters come in various sizes, typically ranging from 3/8″ to 5/8″.
To use a screw adapter, follow these steps:
- Determine the screw size of your boom pole and tripod mount.
- Select the appropriate adapter that matches the boom pole’s screw size on one end and the tripod’s screw size on the other.
- Attach the adapter to the boom pole by threading it onto the pole’s base.
- Mount the adapter to the tripod’s mounting plate or head by screwing it onto the tripod’s mounting screw.
It’s crucial to ensure compatibility between the adapter and your equipment to avoid potential damage or instability. Always check the manufacturer’s specifications or consult with a professional for proper size matching.
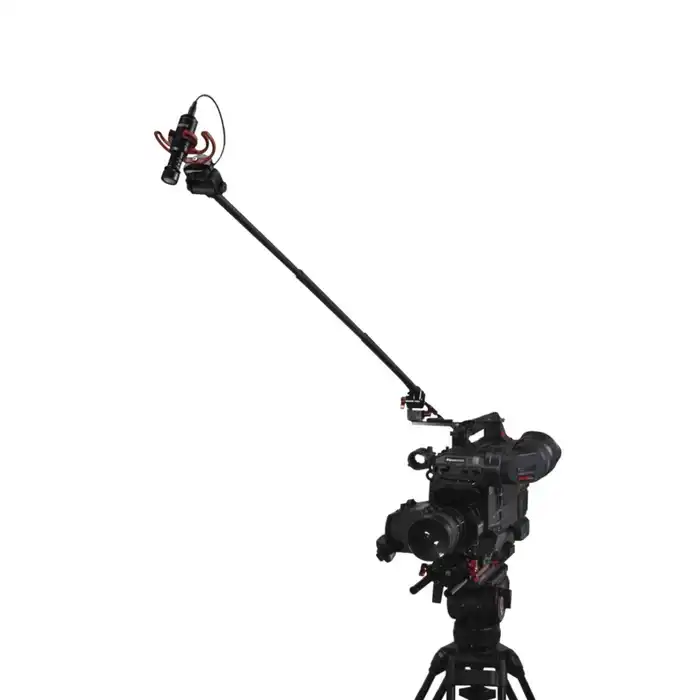
3. Grip Head with Boom Pole Holder
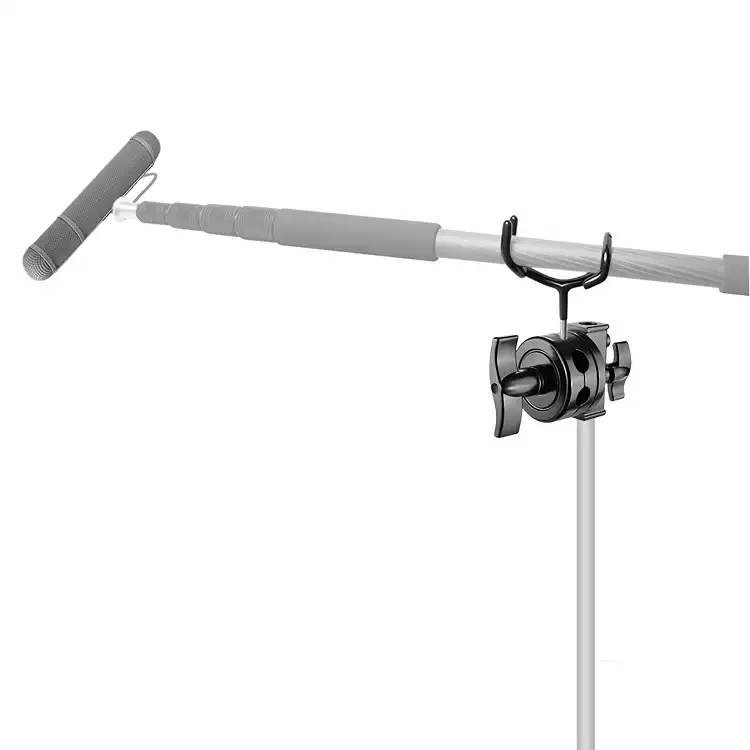
For more complex setups, a grip head with a boom pole holder can provide increased control and flexibility. Grip heads are versatile tools that allow you to mount and adjust various equipment, including boom poles.
To use a grip head with a boom pole holder, follow these steps:
- Mount the grip head onto the tripod’s mounting plate or head, securing it tightly.
- Attach the boom pole holder to the grip head, ensuring it’s locked in place.
- Insert the boom pole into the boom pole holder and tighten the clamp or locking mechanism.
- Adjust the grip head’s positioning and tilt as needed for your desired microphone placement.
This setup offers precise microphone positioning and tilting capabilities, making it ideal for demanding recording scenarios.
Safety note: When using any adapter or mounting system, it’s essential to follow the recommended weight limits and ensure a secure and stable setup. Overloading or improperly attaching equipment can lead to potential accidents or damage.
DIY Methods to Attach Boom Poles to Tripod
For those with a more hands-on approach and access to the right tools, DIY methods can be explored. However, it’s important to note that these methods should only be attempted by experienced users with proper equipment.
Caution: DIY methods may involve modifying or repurposing equipment, which can potentially lead to instability or damage if not done correctly. Proceed with caution and prioritize safety.
- Dual Flash Bracket with C-clamps

One DIY method involves using a dual flash bracket with C-clamps to secure the boom pole to the tripod legs. Here’s how you can set it up:
- Obtain a dual flash bracket (typically used for mounting two camera flashes) and two compatible C-clamps.
- Attach the C-clamps to the tripod legs, positioning them at a suitable height for your desired microphone placement.
- Secure the dual flash bracket to the C-clamps, ensuring it’s tightly clamped in place.
- Insert the boom pole into the dual flash bracket’s mounting slots or clamps, adjusting the tightness as needed.
This method provides a sturdy and customizable setup, but it’s essential to consider the weight limitations and ensure proper clamping techniques to maintain stability.
2. Modified Tripod Head (Advanced)
For advanced users with extensive experience and specialized tools, it’s possible to modify a tripod head to accommodate a boom pole mount. This method involves disassembling and modifying the tripod head, potentially requiring machining or fabrication.
Warning: Modifying tripod heads is an advanced task that should only be attempted by professionals or individuals with extensive experience in equipment modification. Improper modifications can cause damage, instability, or potential safety hazards.
If you’re interested in exploring this method, it’s highly recommended to consult a professional or seek guidance from experienced individuals within the audio or filmmaking community.
Consider These When Attaching Boom Poles to Tripods
Regardless of the method you choose for attaching a boom pole to a tripod, there are several important considerations to keep in mind:
- Weight Capacity
Ensure that your tripod can handle the combined weight of the boom pole, microphone, and any additional accessories you plan to use. Refer to the tripod’s weight capacity specifications or consult with the manufacturer to determine its load-bearing capabilities.
It’s essential to stay within the tripod’s recommended weight limit to ensure a safe and stable setup.
- Stability and Balance
Proper balance is crucial for maintaining a stable setup, especially when dealing with extended boom poles or heavier microphones. Even a slight imbalance can lead to instability and potentially compromise the quality of your audio recordings.
To achieve optimal stability, consider the following tips:
- Use sandbags or other weights to counterbalance the boom pole if necessary. Strategically placing weights on the tripod legs or base can help maintain balance and prevent tipping.
- Adjust the boom pole’s length and position to distribute the weight evenly across the tripod’s center of gravity.
- If using a grip head or articulating arm, ensure that it’s securely tightened and properly balanced to prevent unwanted movement.
- Microphone Type and Weight
The type and weight of the microphone you’ll be using can also influence the choice of attachment method and the required tripod strength. Generally, heavier microphones or microphone setups (e.g., shotgun microphones with shock mounts) will require a sturdier tripod and a more robust attachment method.
By taking into account the microphone’s weight and size, you can make an informed decision about the appropriate tripod and attachment method, ensuring a stable and reliable setup.
Benefits of Using a Boom Pole with a Tripod
Using a boom pole in conjunction with a tripod offers several advantages for audio recording:
- Increased Reach and Flexibility
One of the primary benefits is the increased reach and flexibility for microphone placement. By extending the boom pole, you can position the microphone closer to the desired sound source, regardless of its location. This allows you to capture audio from various angles and distances, providing greater versatility in your recording setup.
- Improved Audio Quality
By using a boom pole with a tripod, you can position the microphone closer to the sound source, minimizing the amount of background noise captured. This results in improved audio quality, with a cleaner and more focused sound recording. The ability to isolate the desired audio source from ambient noise is particularly beneficial in scenarios like filmmaking, live performances, or interviews conducted in noisy environments.
- Hands-free Microphone Control
When the boom pole is securely mounted on a tripod, you can enjoy hands-free microphone control. This frees up your hands to focus on other tasks, such as operating the recording equipment, adjusting camera settings, or conducting interviews without the need to hold the microphone manually. The hands-free operation also helps reduce handling noise, further improving the overall audio quality.
Summing Up
Attaching a boom pole to a tripod is not only possible but also highly recommended for various audio recording applications. By combining these two essential tools, you can unlock a world of improved audio quality, increased flexibility, and hands-free operation.
Whether you opt for a built-in tripod mount, boom pole adapters, or explore DIY methods, it’s essential to consider factors such as weight capacity, stability, and balance to ensure a safe and reliable setup. Additionally, keep in mind the type and weight of your microphone when choosing the appropriate attachment method and tripod strength.