How to Set Up Your Tripod Like a Pro
Setting up a tripod to properly support your camera equipment is an important first step before a photo shoot. Though it may seem straightforward, following a systematic approach when extending the legs will maximize performance and extend the life of your tripod.
When setting up a tripod, the key is to start from the bottom and work upwards. Extend the shortest, lowest tripod legs first then move to the middle section and pull each leg out to the desired length. Finish by carefully extending the top, longest legs last.
In this article, we’ll go through the proper techniques to set up any tripod like a true pro. From choosing the right tripod to step-by-step instructions for different shooting scenarios, you’ll gain the technical know-how to unlock new creative possibilities.
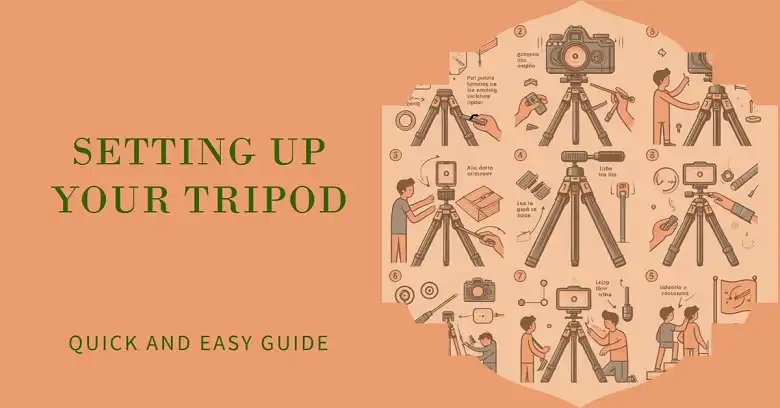
Setting Up A Tripod
Step-by-Step Guide
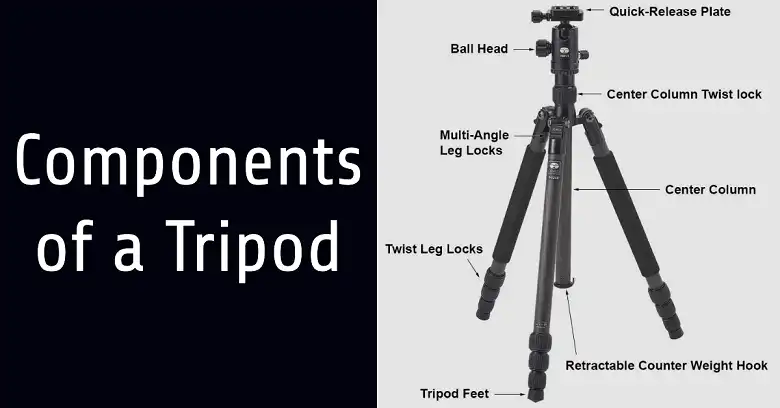
- Extend the Tripod Legs: Start by extending the tripod legs to your desired height. Most tripods have multiple leg sections that can be extended or retracted independently. Unlock each leg section and extend it fully, ensuring that the twist or flip locks are securely engaged at your desired length.
- Attach the Tripod Head: Most tripod heads attach to the center column or apex of the tripod legs. Follow the manufacturer’s instructions for securely attaching the head, typically involving screwing it onto the threaded mounting plate or using a locking mechanism.
- Mount Your Camera: Once the tripod head is attached, it’s time to mount your camera. Many tripod heads feature a quick-release plate system, where a plate is attached to the camera’s tripod mount, allowing for easy attachment and removal from the head. Alternatively, you can directly screw your camera onto the tripod head’s mounting thread.
- Level the Tripod: Proper leveling is essential for achieving sharp, level images and videos. Most tripods include built-in bubble levels, either on the center column or the tripod head. Adjust the leg angles and heights until the bubble is centered, indicating a perfectly level setup. For precise leveling on uneven terrain, consider using specialized leveling bases or a hot shoe-mounted bubble level.
- Adjust the Tripod Head: Once your camera is mounted and the tripod is level, adjust the tripod head to achieve your desired framing and composition. Ball heads offer smooth, multi-directional adjustments, while pan-tilt heads provide precise control over horizontal and vertical movements.
Pro Tips
Stability: For maximum stability, spread the tripod legs as wide as possible, forming a broad, sturdy base. On uneven terrain, adjust the individual leg lengths to ensure all three legs are firmly planted.
Safety: Never leave your tripod unattended in crowded areas, as it can pose a tripping hazard. When setting up on elevated surfaces or near drop-offs, always secure the tripod to a stable anchor point using a safety tether or weight hook.
Grip and Weight Hooks: In windy conditions or when shooting long exposures, adding weight to the tripod’s center column or hook can significantly improve stability. Use a dedicated weight hook or hang your camera bag from the center column to provide additional downward force and prevent camera shake.
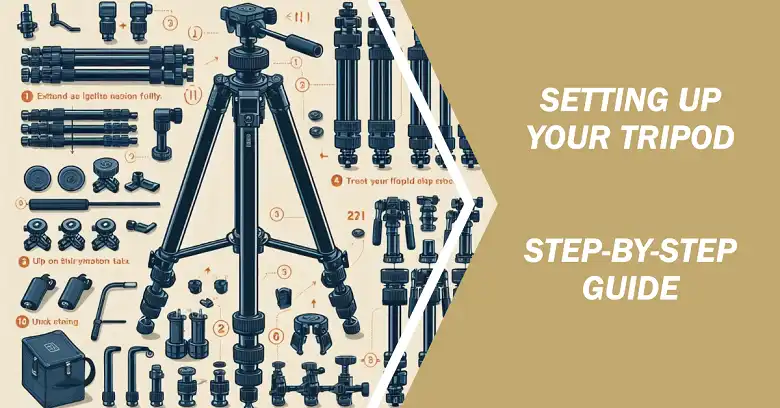
Advanced Tripod Setup Techniques
Macro Photography
Exploring the intricate details of the world up close requires exceptional stability and precision. A tripod is essential for maintaining critical focus and achieving tack-sharp macro images.
Setup Tips:
- Use a sturdy tripod with a geared or focusing rail head for precise focus adjustments.
- Position the tripod close to your subject, adjusting the legs and center column to achieve the desired framing and working distance.
- Consider using a remote shutter release or self-timer to eliminate camera shake caused by pressing the shutter button.
- For increased depth of field, experiment with focus stacking techniques, taking multiple shots at different focus points and combining them in post-processing.
Long Exposure Photography
Capturing light trails, smooth waterfalls, and stellar night skies often requires long exposure times. A sturdy tripod is a must for achieving sharp, blur-free results.
Setup Tips:
- Use a remote shutter release or self-timer to avoid camera shake during long exposures.
- Enable mirror lockup on your camera to reduce vibrations caused by the mirror mechanism.
- Use neutral density filters to achieve longer exposures during the day, allowing you to capture motion blur in subjects like waterfalls or clouds.
- In low-light conditions, use a tripod with a built-in hook or center column for adding weight, improving stability during extended exposures.
Panoramic Photography
Capturing breathtaking panoramic vistas often requires stitching multiple images together. A tripod with a panning head makes this process much easier and more precise.
Setup Tips:
- Mount your camera on a tripod with a dedicated panoramic or panning head, which allows for smooth, controlled rotational movements.
- Use the tripod’s panning base or nodal slide to rotate the camera precisely, maintaining the same nodal point (the entrance pupil of the lens) for each shot.
- Overlap each frame by 30-50% to ensure sufficient coverage for seamless stitching in post-processing.
- Shoot in manual mode, maintaining consistent exposure settings across all frames for consistent brightness and color.
Time-Lapse Photography
Capturing slow-moving events over time, such as sunsets, cloud movements, or construction projects, requires a tripod to ensure consistent framing throughout the sequence.
Setup Tips:
- Use an intervalometer or dedicated time-lapse app to automate the shooting process, capturing frames at regular intervals.
- Secure your tripod firmly to the ground or a stable surface, ensuring it won’t move or shift between frames.
- For extended time-lapses, consider using a portable power source or battery grip to prevent your camera from draining its battery mid-sequence.
- Position your tripod in a location with an unobstructed view of the scene, taking into account potential changes in lighting conditions or moving objects.
Video Recording
Smooth, cinematic video footage is heavily reliant on a sturdy tripod and precise camera movements. A fluid video head is essential for achieving professional-quality results.
Setup Tips:
- Use a dedicated video tripod head with precise pan and tilt controls, allowing for smooth, controlled camera movements.
- Enable image stabilization on your lens or camera body for added smoothness, compensating for any minor vibrations or movements.
- Adjust the tripod’s leg angles to achieve unique low-angle or overhead shots, adding visual interest to your footage.
- For panning or tracking shots, use the tripod’s built-in markers or guides to maintain consistent movement speed and framing.
How to Set Up a Tripod Stand
Setting up a stable tripod stand is crucial for ensuring accurate and consistent results, whether you’re shooting portraits, product photography, or video.
Steps:
- Extend the tripod legs to the desired height, ensuring they are securely locked in place.
- Spread the legs as wide as possible, forming a broad, sturdy base. Adjust the individual leg angles to accommodate uneven surfaces or achieve specific framing requirements.
- Level the tripod using the built-in bubble levels or a hot shoe-mounted level, adjusting the leg heights until the bubble is perfectly centered.
- For added stability, consider using a tripod apron or sandbags to weigh down the legs, preventing any potential movement or vibration.
How to Set Up a Tripod for a Portrait Photograph
Capturing flattering portraits often requires precise positioning and framing, which a tripod can help achieve with ease.
Tips:
- Adjust the tripod height to approximately eye level for a natural, flattering perspective. For seated or child subjects, lower the tripod accordingly.
- Use a ball head for easy positioning and framing, allowing you to adjust the camera’s angle and orientation quickly.
- Consider adding a remote shutter release or self-timer to eliminate camera shake caused by pressing the shutter button.
- Experiment with different lens focal lengths and framing techniques, such as tighter headshots or environmental portraits, adjusting the tripod height and position as needed.
How to Set Up a Tripod for a Landscape Photograph
Breathtaking landscapes demand maximum sharpness and detail, which a tripod can provide by eliminating camera shake and enabling advanced techniques.
Tips:
- Use a sturdy tripod that can support the weight of your camera and lens setup, especially when using larger telephoto or zoom lenses.
- Adjust the tripod height to your preferred shooting position, whether standing or seated, for comfortable framing and operation.
- Use a remote shutter release or self-timer to avoid any camera movement during the exposure.
- For increased depth of field, use focus stacking techniques by taking multiple shots at different focus points and combining them in post-processing.
- When shooting in low-light conditions or during golden hour, use a tripod with a hook or center column for adding weight, improving stability during longer exposures.
How to Set Up a Tripod for Your Phone
Don’t underestimate the power of smartphone photography. With the right tripod setup, you can elevate your mobile shots to new heights.
Tips:
- Invest in a tripod mount or adapter specifically designed for smartphones, ensuring a secure and stable connection.
- Adjust the tripod height and positioning to achieve creative angles and perspectives, taking advantage of your smartphone’s compact size.
- Use a remote shutter app or self-timer to avoid camera shake caused by pressing the shutter button on your phone.
- Experiment with long exposure techniques, such as light painting or capturing star trails, by mounting your phone on a sturdy tripod.
Setting Up a Tripod for Surveying
In surveying and mapping applications, precision and accuracy are paramount. A tripod designed specifically for these purposes is essential for reliable data collection.
Tips:
- Choose a heavy-duty tripod designed for surveying equipment, ensuring maximum stability and durability.
- Level the tripod meticulously using the built-in bubble levels, laser levels, or other specialized leveling tools.
- Adjust the tripod height and positioning for optimal instrument alignment, ensuring precise measurements and data collection.
- Consider using a tripod with an integrated or detachable surveying column for added height and stability when working with larger instruments.
Setting Up a Tripod Deer Stand
Capturing stunning wildlife shots from a deer stand requires a portable, stable tripod setup that can withstand the challenges of the outdoors.
Tips:
- Use a compact, lightweight tripod that can easily be transported to your hunting spot, yet offers sufficient stability for your camera and lens setup.
- Adjust the tripod height and positioning for a clear view through the deer stand windows or shooting ports.
- Secure the tripod firmly to the stand or ground using clamps, stakes, or weights to prevent any movement that could spook nearby wildlife.
- Consider using a camouflage tripod leg cover or wrap to help your setup blend in with the surroundings.
How to Set Up a Tripod with a Ring Light
Achieve flattering, evenly lit portraits or product shots by combining a ring light with a tripod for optimal lighting and framing.
Tips:
- Choose a tripod with a weight capacity suitable for your camera and ring light setup, ensuring stability and support.
- Adjust the tripod height and positioning for optimal lighting and framing, ensuring the ring light is centered on your subject.
- Use a ball head for easy positioning and angling of the ring light, allowing you to control the direction and intensity of the lighting.
- For product photography, consider using a tripod with an adjustable horizontal arm or boom to position the ring light precisely around your subject.
Choosing the Right Tripod
Not all tripods are created equal, and selecting the right one is crucial for achieving optimal results. Here’s what you need to consider:
Height
Determine the maximum height you’ll need for your shooting scenarios. Look for a tripod that extends to at least eye level when fully extended, ideally a few inches taller to allow for comfortable framing and viewfinder usage.
Weight and Load Capacity
A tripod’s weight directly correlates to its stability and load-bearing capacity. Heavier tripods, typically made of aluminum or carbon fiber, offer superior stability but can be cumbersome to carry. Lighter tripods are more portable but may struggle to support heavier camera setups.
As a general rule, choose a tripod with a load capacity of at least twice the combined weight of your heaviest camera body, lens, and accessories.
Materials
Aluminum tripods are affordable and durable, making them a popular choice for many photographers. Carbon fiber tripods, while more expensive, offer exceptional strength and stability while being significantly lighter than their aluminum counterparts.
Tripod Head
The tripod head is the component that allows you to position and adjust your camera. Ball heads are versatile and offer smooth, multi-directional movements, making them ideal for still photography. Pan-tilt heads excel at precise, controlled movements, which is essential for video work. Gimbal heads are designed to support heavy camera setups, such as those used in wildlife or sports photography, ensuring stability and smooth movement.
Leg Locks and Twist Locks
Examine the leg locks or twist locks carefully. High-quality tripods feature robust locking mechanisms that securely hold the legs in place, preventing slippage or collapse under load.
Tripod Maintenance and Care
Proper maintenance and care are essential for ensuring your tripod remains in top condition and continues to provide reliable performance for years to come.
- Clean your tripod regularly, wiping down the legs, head, and other components with a soft, dry cloth to remove dirt, dust, and debris.
- After using your tripod in wet or damp conditions, thoroughly dry it before storage to prevent corrosion or damage.
- Apply a small amount of lubricant (as recommended by the manufacturer) to the leg locks, head mechanisms, and other moving parts to ensure smooth operation and prevent binding or seizing.
- Store your tripod in a dry, dust-free environment, preferably in a dedicated carrying case or bag to protect it from scratches, dents, and other potential damage.
- Inspect your tripod periodically for any loose parts, worn components, or damage, and make necessary repairs or replacements as needed.
Frequently Asked Questions (FAQs)
How do I choose the right tripod height?
The ideal tripod height depends on your specific shooting needs and preferences. As a general rule, choose a tripod that extends to at least eye level when fully extended, allowing you to comfortably frame and operate your camera without hunching over. For low-angle shots or seated shooting positions, a shorter tripod may be more suitable.
How do I level a tripod on uneven terrain?
When setting up on uneven or sloped terrain, adjust the individual leg lengths to ensure all three legs are firmly planted and the tripod is level. Use the built-in bubble levels or a hot shoe-mounted level to achieve precise leveling. If necessary, place weights or sandbags on the tripod legs or use specialized leveling bases to compensate for uneven surfaces.
How do I transport and store my tripod?
When transporting your tripod, consider using a dedicated carrying case or bag to protect it from scratches, dents, and other potential damage. For storage, keep your tripod in a dry, dust-free environment, and consider applying a small amount of lubricant to the moving parts to ensure smooth operation and prevent seizing.