Canon M50 Cheat Sheet
The Canon EOS M50 is a versatile mirrorless camera known for its compact size, powerful features, and ease of use. Whether you’re a budding photographer, content creator, or a casual user, understanding its settings and features is crucial for achieving high-quality results. This detailed cheat sheet will guide you through all the essential aspects of the Canon M50, helping you optimize your camera for various scenarios.

Introduction to the Canon M50
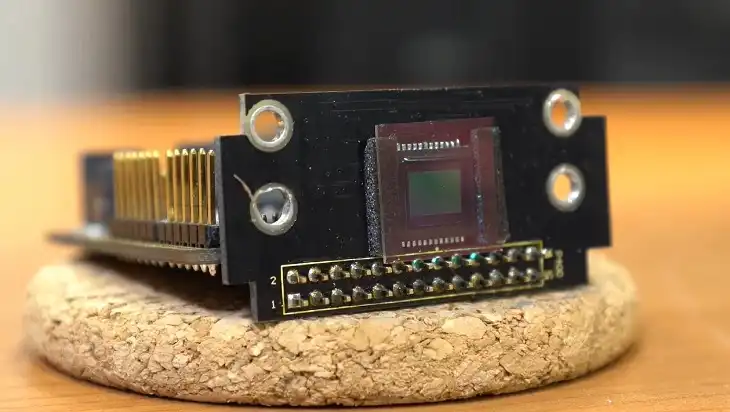
Released in 2018, the Canon EOS M50 features a 24.1 Megapixel APS-C CMOS sensor and the advanced DIGIC 8 Image Processor. This setup ensures high-resolution images, excellent color reproduction, and reduced noise even in low-light environments. Its compact and lightweight design (weighing only 387 grams) makes it an ideal choice for travel and daily photography.
Key Specifications:
- Sensor: 24.1 MP APS-C CMOS
- Processor: DIGIC 8
- ISO Range: 100-25600 (expandable to 51200)
- Autofocus System: Dual Pixel CMOS AF
- Continuous Shooting Speed: Up to 10 fps
- Video Recording: 4K (24 fps), Full HD (60 fps)
- Display: 3-inch Vari-Angle Touchscreen (1.04 million dots)
- Weight: 387g (body only)
The M50 stands out for its 4K video capabilities, a versatile Vari-Angle LCD touchscreen, and advanced features such as Eye Detection AF, making it a favorite among vloggers and content creators.
Purpose of This Cheat Sheet
This cheat sheet is a quick reference guide that simplifies the M50’s various settings and functions. With this guide, you’ll spend less time on the setup and more time focusing on creativity and composition. Whether you’re shooting stills, recording videos, or experimenting with manual controls, this cheat sheet will help you get the most out of your Canon M50.
- Camera Body and Controls
Button Layout and Functions
The Canon M50 has a user-friendly layout, making it easy to access essential controls even for beginners. Below is a detailed breakdown of the key buttons and dials on the camera:
- Mode Dial: Located on the top right of the camera, it allows quick switching between shooting modes such as Auto, Manual, Aperture Priority, and Video modes.
- Shutter Button: Positioned on the camera’s grip, right above the power switch. It is designed for comfortable pressing during handheld shooting.
- Multi-Function Button: Found near the shutter button; you can customize this for instant access to frequently used functions like ISO or AF mode.
- AF-On Button: Located on the back, near the thumb grip. Useful for back-button focusing, giving more control over autofocus.
- Vari-Angle Touchscreen: The 3.0-inch LCD screen can be flipped and rotated, making it ideal for shooting at high or low angles, and for vlogging.

Dial Operations
The M50’s main control dial (located near the shutter button) allows you to change exposure settings quickly. For example, in Manual Mode, rotating this dial adjusts the shutter speed, and pressing the exposure compensation button simultaneously lets you modify the aperture.
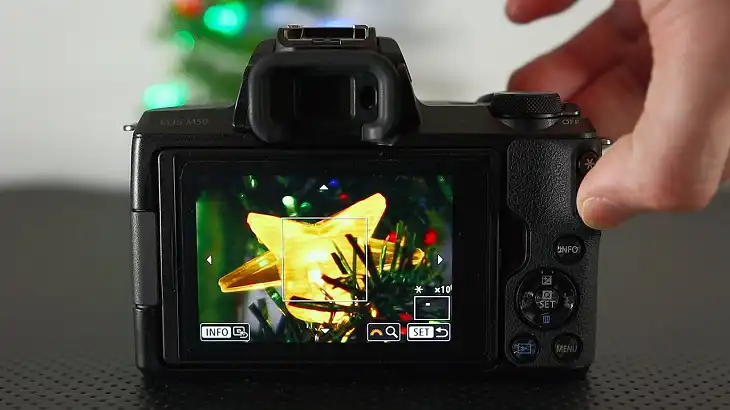
Touch Screen Interface
The camera’s Vari-Angle touchscreen makes navigating menus and settings intuitive. Tap to focus, swipe through photos, or use the Quick Control menu to adjust shooting settings like ISO, white balance, and exposure compensation in real-time.
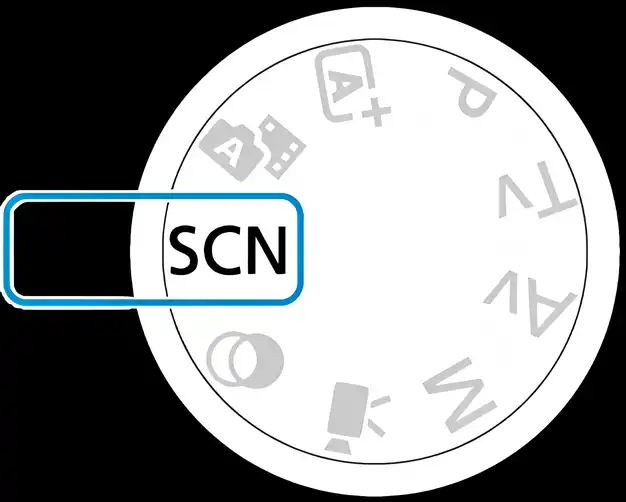
- Shooting Modes
The Canon M50 offers multiple shooting modes, each tailored for different creative needs and skill levels.
Auto Modes: Scene Intelligent Auto and Hybrid Auto
Auto Modes are perfect for beginners. Scene Intelligent Auto automatically detects the type of scene and optimizes the camera settings for the best possible result. Hybrid Auto adds short video clips with stills to create a visual diary of your shooting day.
Program AE (P) Mode
Program Mode gives you more control than Auto while still automating most settings. You can adjust parameters like ISO, exposure compensation, and white balance, making it ideal for learning manual settings.
Shutter Priority (Tv) Mode
This mode lets you set the shutter speed, making it ideal for capturing motion. Use a faster shutter speed (e.g., 1/500s) for sports or fast-moving subjects to freeze action, and a slower speed (e.g., 1/30s) to create motion blur effects.
Aperture Priority (Av) Mode
In Aperture Priority, you control the depth of field by selecting the aperture size. A wider aperture (e.g., f/2.8) results in a blurred background, which is perfect for portraits. A narrower aperture (e.g., f/11) increases depth of field, ideal for landscapes.
Manual (M) Mode
Manual Mode offers complete control over all exposure settings. Adjust the ISO, shutter speed, and aperture to achieve the exact exposure you want. This mode is recommended for tricky lighting conditions or creative effects.
Custom Modes (C1, C2)
Save your preferred settings for quick access. For example, set C1 for night photography with custom ISO and white balance settings, and C2 for fast-action shooting with Servo AF and a high shutter speed.
- Autofocus System
Autofocus Modes
The M50’s Dual Pixel Autofocus (AF) system is highly effective for both photos and videos. It offers three main modes:
- One-Shot AF: Ideal for static subjects such as portraits and landscapes.
- Servo AF: Tracks moving subjects continuously, perfect for sports or wildlife photography.
- Manual Focus (MF): Allows you to fine-tune focus, useful for macro shots and precise compositions.
Autofocus Methods
The Canon M50 has several AF methods to choose from, depending on your shooting needs:
- Face+Tracking AF: Detects and locks onto faces, keeping them in focus.
- Zone AF: Focuses within a defined zone, suitable for group shots.
- 1-Point AF: Pinpoints focus on a specific area, offering more control.
Back-Button Focusing
For advanced users, back-button focusing is a great technique that decouples focusing from the shutter button. This gives you better control, especially in dynamic environments.
- Exposure Control and Settings
Metering Modes Explained
The Canon M50 offers four metering modes to measure the light and determine the exposure settings:
- Evaluative Metering: Measures light across the entire frame, ideal for general use.
- Partial Metering: Measures a smaller area (approx. 6.5% of the frame), useful for backlit subjects.
- Spot Metering: Focuses on a small area (approx. 2.8%), perfect for high-contrast scenes.
- Center-Weighted Average: Prioritizes the center, useful when the subject is in the middle of the frame.
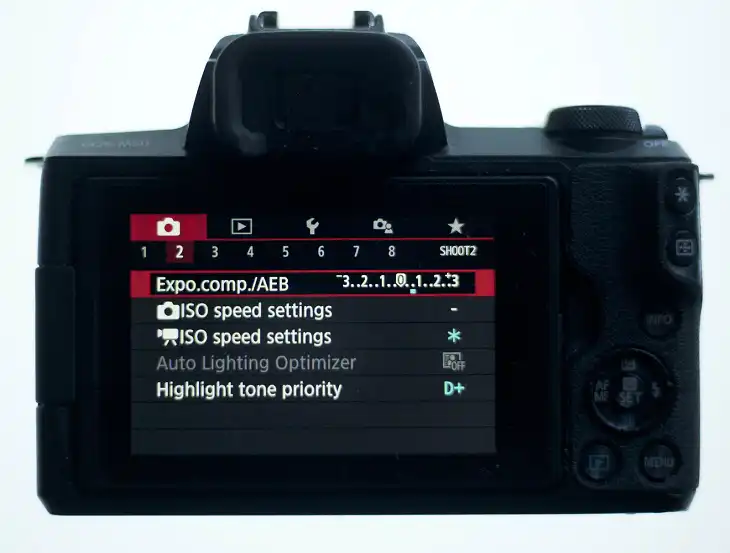
Exposure Compensation
Use exposure compensation to quickly brighten or darken your shot, from -3 to +3 EV. This is particularly useful in high-contrast scenes.
Auto Exposure Bracketing (AEB)
AEB takes three consecutive shots at different exposures, helping you capture the perfect shot in tricky lighting.
ISO Settings and Auto ISO
The M50’s native ISO range is 100-25600, expandable to 51200. Use lower ISOs in bright conditions for minimal noise, and increase it in low light for a better-exposed image.
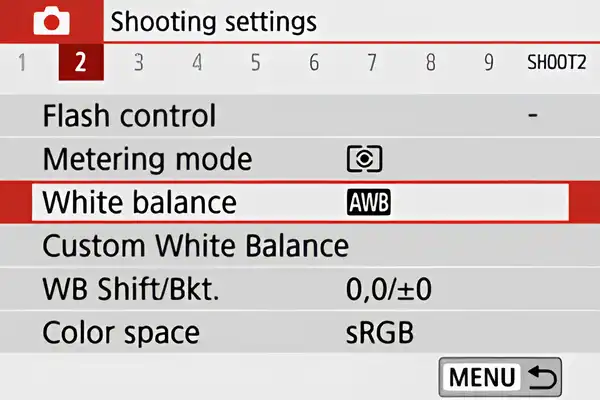
- White Balance for Accurate Colors
White Balance (WB) is essential to ensure that your images have true-to-life colors, compensating for various lighting conditions. The Canon M50 offers several preset options and the ability to customize settings for unique environments.
Preset White Balance Options
The camera comes with predefined white balance settings to match specific lighting conditions. These presets include:
- Auto White Balance (AWB): Automatically detects and adjusts the white balance based on the scene’s color temperature.
- Daylight: Ideal for outdoor settings on sunny days.
- Cloudy: Warms up colors slightly for overcast conditions.
- Tungsten: Compensates for the orange hue produced by tungsten bulbs.
- Fluorescent: Reduces the greenish tint typical of fluorescent lighting.
- Flash: Adjusts for the cool, bluish light produced by flash units.
Custom White Balance
In tricky lighting situations, such as mixed lighting or scenes with strong color casts, setting a custom white balance provides more accurate colors. To set a custom WB, take a photo of a white or neutral gray object under the lighting condition, and the M50 will use that reference to balance colors.
White Balance Bracketing
White Balance Bracketing captures three images with varying white balance settings, allowing you to select the most accurate color reproduction afterward. This is especially helpful in challenging lighting conditions, such as sunrise or sunset shots.
- Image Quality and File Formats
RAW vs JPEG
The Canon M50 offers two primary file formats: RAW and JPEG. Understanding their differences will help you choose the best format for your needs:
- RAW Files: These uncompressed files contain all the image data captured by the sensor, allowing extensive post-processing. Use RAW when you want the highest image quality and maximum editing flexibility.
- JPEG Files: Compressed files that are smaller in size but lack some of the editing headroom of RAW. JPEGs are ideal for quick sharing and when storage space is a concern.
Image Size and Quality Settings
The M50 offers multiple options for image size and quality:
- Full (L), Medium (M), and Small (S): Choose these depending on how large you want your image files to be. Full resolution is best for printing or cropping.
- Fine, Normal: These settings adjust JPEG compression. Use Fine for high-quality results and Normal to save space.
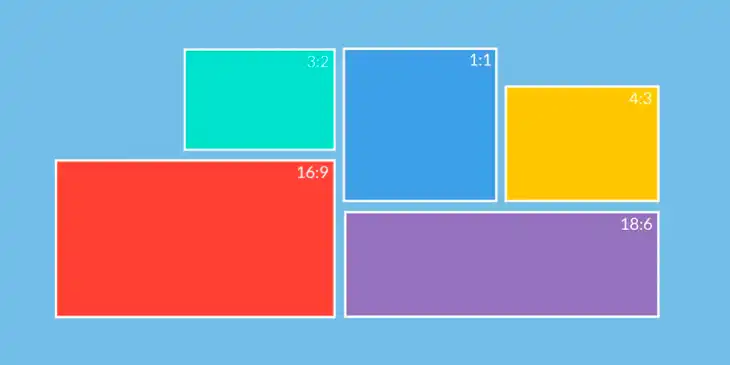
Aspect Ratios
Adjust the aspect ratio to match your creative vision:
- 3:2 (Standard): Matches the native sensor size, ideal for general photography.
- 4:3: Useful for displaying on TVs or monitors.
- 16:9: Perfect for wide-angle shots or cinematic video.
- 1:1: Square format, great for social media posts like Instagram.
- Video Recording on the Canon M50
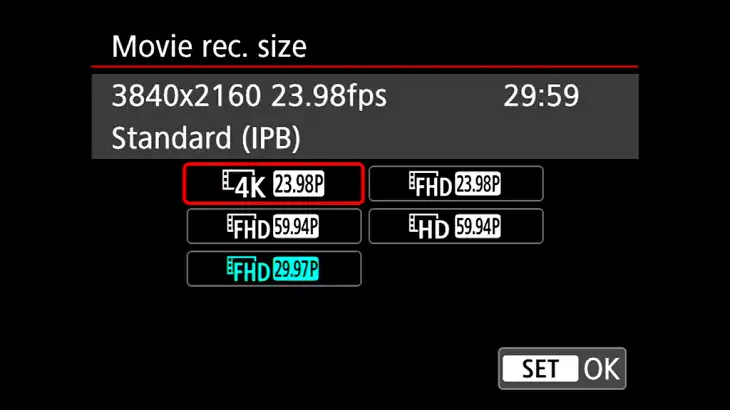
4K and HD Video Options
The Canon M50 is highly regarded for its video capabilities, offering 4K video recording at 24 fps. However, it’s worth noting that in 4K mode, a 1.6x crop factor is applied, limiting your field of view. If you want to avoid this crop, shoot in Full HD (1080p), which offers frame rates of 60 fps for smooth, high-quality footage.
Frame Rates and Bit Rates
Understanding frame rates is crucial for creating the desired effect in your videos:
- 24 fps: Traditional cinematic look.
- 30 fps: Standard video frame rate.
- 60 fps: Suitable for slow-motion and smooth action shots.
Time-Lapse and Slow-Motion Features
The M50’s built-in Time-Lapse Movie mode is perfect for capturing gradual changes like sunsets or cityscapes. It offers three pre-set options for different intervals, making it easy to experiment. For slow-motion, shoot at 60 fps and then slow it down in post-production for a smooth effect.
- Wireless Connectivity: Using Wi-Fi and Bluetooth
The Canon M50 is equipped with both Wi-Fi and Bluetooth, making it easy to transfer photos, control the camera remotely, and share your work online.
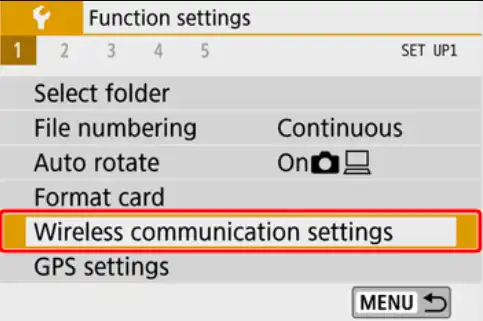
Setting Up Wi-Fi and Bluetooth
To set up Wi-Fi, go to the “Wireless Communication Settings” in the menu and connect to your smartphone or PC. Download the Canon Camera Connect app for iOS or Android to access remote control and image transfer features.
For Bluetooth, navigate to “Bluetooth Function” in the menu and pair with compatible devices like smartphones, wireless remotes, or GPS modules.
Canon Camera Connect App Features
The Canon Camera Connect app enables you to remotely control the camera, change settings, and transfer images wirelessly. This is especially useful for group shots, vlogging, or setting up self-portraits without touching the camera.
Remote Shooting and File Transfer
With the app, you can trigger the shutter, adjust focus, and even start/stop video recording remotely. The “Image Transfer” feature lets you instantly send photos to your phone for social media sharing or backup.
- Custom Functions and Personalization
Custom Menu Setup
The Canon M50 allows you to create a My Menu tab, where you can store frequently accessed settings for quick navigation. Customize it with options like “Format Card,” “White Balance,” and “Metering Modes” to streamline your workflow.
Customizable Buttons
You can assign various functions to buttons such as the Multi-Function (MF) button and the Set button. For example, set the MF button to change ISO or enable back-button focusing, depending on your shooting style.
My Menu Configuration
To configure My Menu, go to the menu settings, select “My Menu,” and add your most-used functions. This feature is particularly useful for advanced users who frequently switch between different modes and settings.
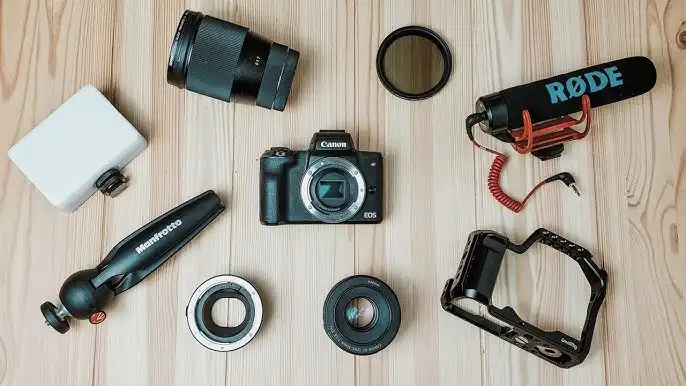
- Key Accessories for the Canon M50
Recommended Lenses for the EF-M Mount
The Canon M50 uses the EF-M mount, but with an adapter, it can also use EF and EF-S lenses. Some recommended lenses include:
- Canon EF-M 22mm f/2 STM: A compact prime lens, perfect for street and portrait photography.
- Canon EF-M 11-22mm f/4-5.6 IS STM: A great wide-angle lens for landscapes and architecture.
- Canon EF-M 55-200mm f/4.5-6.3 IS STM: For wildlife and sports, offering extended reach.
Compatible Flashes
For low-light conditions or creative lighting, consider adding an external flash:
- Canon Speedlite 430EX III-RT: Offers advanced lighting options and wireless control.
- Godox TT350C: A budget-friendly alternative with excellent performance.
Adapters for EF and EF-S Lenses
If you have existing EF or EF-S lenses, use the Canon EF-EOS M Adapter to make them compatible with your M50, giving you access to a broader range of lens choices.
Quick M50 Tips and Tricks for Optimal Results
Optimal Settings for Common Shooting Scenarios
- Portraits: Use Aperture Priority (f/2.8-f/5.6) for shallow depth of field, with Face+Tracking AF enabled.
- Landscapes: Switch to Aperture Priority (f/8-f/11) with Evaluative Metering and set ISO to 100.
- Action Shots: Use Shutter Priority (1/500s or faster) with Servo AF and Continuous Shooting mode.
Battery Life Conservation
Turn off the LCD screen when not in use and reduce the Auto Power Off time to save battery. The M50’s battery life is approximately 235 shots per charge, so consider carrying a spare for extended shoots.
Firmware Updates
Regularly check Canon’s website for firmware updates. Firmware updates can improve performance and add new features. To update, download the latest firmware and follow Canon’s instructions for installation.
Wrapping Up
The Canon M50 is an excellent tool for photographers and videographers alike, packed with features that allow creative freedom and precision. With this cheat sheet, you’ll have a quick reference guide to make the most out of your M50, from shooting stills and videos to troubleshooting and customization.