How to Use Softbox Lighting for Product Photography?
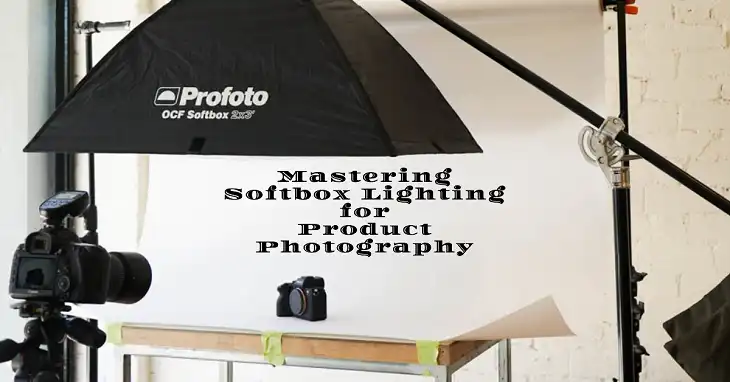
Achieving professional-looking product photos can make a huge difference in how your products are perceived by potential buyers. Whether you’re shooting for an e-commerce site, social media, or a personal portfolio, softbox lighting is one of the most effective tools for creating soft, even lighting that highlights the details of your product without harsh shadows or reflections.
In this article, we’ll cover everything you need to know about using softbox lighting for product photography, from setup to techniques that will elevate your shots.
What is a Softbox, and Why Is It Ideal for Product Photography?
A softbox is a type of photographic lighting device that diffuses light through a translucent fabric, creating soft, evenly distributed illumination. The goal of a softbox is to mimic natural light, which reduces the contrast and harsh shadows that are common when using direct artificial lighting.
For product photography, softbox lighting helps:
- Minimize harsh shadows: Soft lighting wraps around the product, reducing deep shadows and providing a more professional look.
- Control reflections: Especially important for shiny or reflective surfaces, softbox lighting softens glare and hotspots.
- Highlight details: The soft, even lighting highlights the texture and features of your product without washing them out.
Step 1: Choosing the Right Softbox for Your Product Photography
Before you start, selecting the right size and shape of softbox is essential to ensure you get the lighting you need for your specific product.
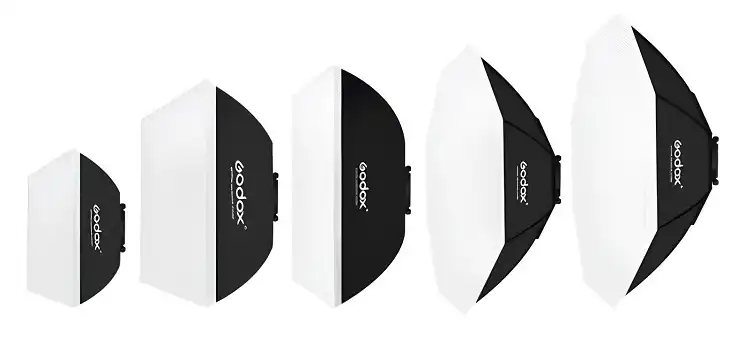
For small products like jewelry, electronics, or makeup, a small to medium softbox (ranging from 12 to 24 inches) is ideal. This size is perfect for focusing light on smaller objects without creating overly harsh lighting or strong shadows. On the other hand, if you’re working with larger items such as clothing, furniture, or home décor, a large softbox of 36 inches or more will be better suited for your needs, as it spreads light over a wider area evenly.
The shape of the softbox also matters. A rectangular or square softbox is commonly used for product photography, as it offers a wide, even spread of light, particularly useful for products with defined edges. For round or cylindrical items, such as bottles or vases, an octagonal softbox (also known as an octabox) provides more uniform lighting around curved surfaces, eliminating harsh spots.
Step 2: Positioning the Softbox Correctly
Once you’ve selected the right softbox, the next step is positioning it correctly to get the most flattering light for your product. The angle, height, and distance of the softbox can greatly affect the outcome of your photo.
Placing the softbox at a 45-degree angle from your product and slightly above it is a classic method that ensures even lighting with soft shadows. This setup creates a natural look, where the product is well-lit but not flat, and the shadows add subtle depth to the image. If you want minimal shadows, positioning the softbox directly in front of the product can give you even illumination across the surface.
To emphasize texture or details on the top of your product, using top-down lighting is an effective option. This setup works particularly well for items like textiles, wood, or detailed surfaces where you want to highlight the material.
The distance of the softbox from your product also matters. The closer the softbox, the softer the light will be. If you’re aiming for a soft, almost wraparound light that highlights your product’s shape and reduces shadows, position the softbox about 1 to 3 feet away. If you prefer more defined shadows to add contrast, moving the softbox further away, between 3 to 5 feet, will give you a slightly harsher light while still maintaining a professional look.
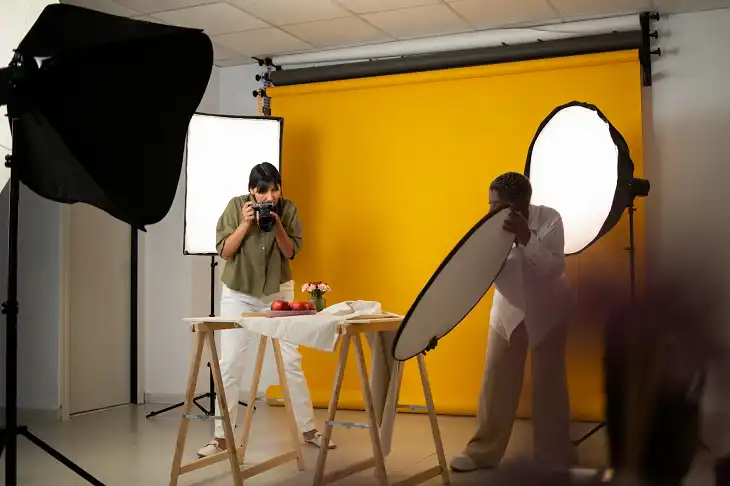
Step 3: Using Multiple Softboxes for Balanced Lighting
While one softbox is often sufficient for small products, using multiple softboxes can enhance the overall lighting balance, especially for more complex setups or larger products.
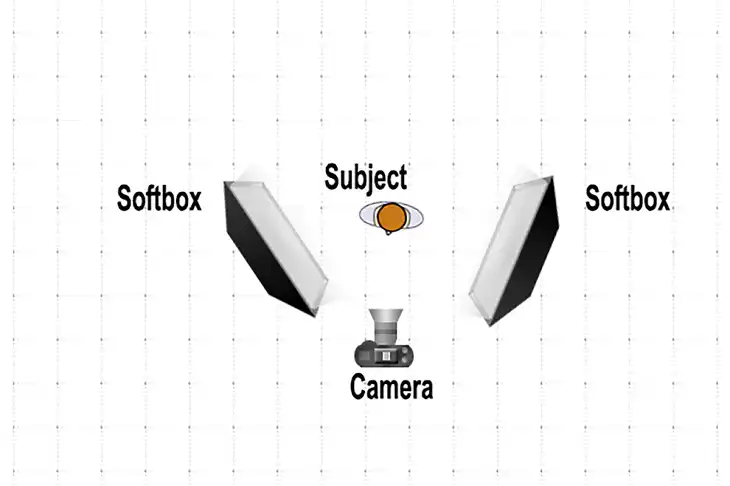
For the best results, you can set up two softboxes, known as a key light and a fill light. The key light is your main source of illumination, placed at a 45-degree angle to your product. It provides the bulk of the light and creates soft shadows. The fill light, positioned on the opposite side of the product, helps to fill in any shadows created by the key light, ensuring an even look.
For more depth and separation between the product and the background, consider adding a backlight. Positioning a third softbox behind the product can help define its edges and make it stand out from the background, giving your photos a more three-dimensional quality.
Step 4: Reducing Reflections and Glare
When photographing shiny or reflective products like glass, metal, or glossy surfaces, controlling reflections can be a challenge. The soft, diffused light from a softbox already helps reduce glare, but additional techniques can further minimize reflections.
One effective method is double diffusion, where you add an extra layer of diffusion material over the softbox. This could be a white sheet, another translucent panel, or a diffuser specific to photography. By softening the light even further, you avoid the sharp reflections that can appear on reflective products.
Another way to reduce glare is by adjusting the angle of the softbox. Instead of placing the softbox directly in front of the product, position it at an angle to avoid harsh reflections bouncing back into the lens. Experiment with different angles and distances to find the perfect balance.
In some cases, using a polarizing filter on your camera lens can also help reduce reflections and glare, particularly when shooting products like watches, glassware, or highly polished items.
Step 5: Adjusting Camera Settings for Softbox Lighting
While lighting is critical, your camera settings also play a significant role in achieving the best results. Pairing the soft, even light from the softbox with the correct camera adjustments will ensure your product photos are clear, sharp, and true to color.
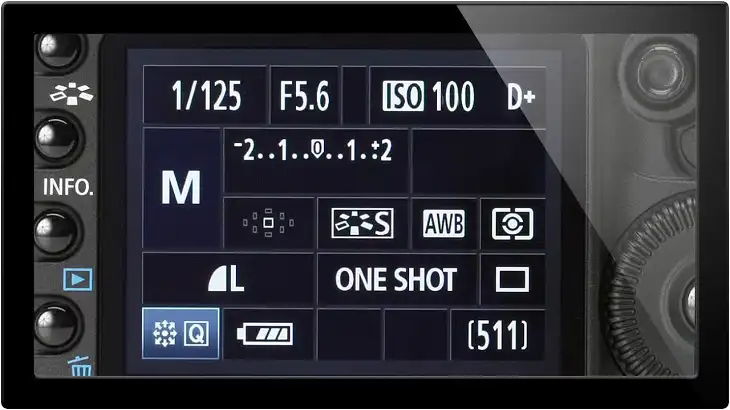
To start, set your camera’s ISO as low as possible, ideally between 100 and 200, to minimize grain and noise in your images. A narrow aperture, typically between f/8 and f/16, will give you a greater depth of field, ensuring that the entire product remains in sharp focus. For products where you want to create a shallow depth of field and blur the background, you can open the aperture to around f/2.8 to f/5.6.
As for shutter speed, since you’re working with controlled lighting, it’s best to keep it between 1/60 and 1/125. This range is ideal for preventing motion blur while still capturing the product crisply. Using a tripod is always a good idea in product photography, especially when working with slower shutter speeds.
Finally, adjust the white balance to match your softbox lighting. Most softboxes have a daylight-balanced color temperature, which is around 5500K, but it’s important to manually adjust your camera’s white balance to ensure that the colors of your product are accurate and free from any color cast.
Step 6: Enhancing Your Photos with Backgrounds and Reflectors
In addition to lighting, the background and use of reflectors can elevate your product photos. For most product shots, a neutral background, such as white, black, or gray, works best as it allows the product to stand out without distraction. A white background, in particular, is highly popular in e-commerce as it creates a clean, modern look.
Using reflectors in your setup helps to bounce light back onto the product, filling in shadows and ensuring an even distribution of light. A white reflector or a simple foam board can be placed on the opposite side of your softbox to help soften shadows and brighten the darker areas of your product. This technique works especially well in a two-light setup, where the reflectors can complement the key and fill lights.
Wrapping Up
By learning to use softbox lighting effectively, you can drastically improve the quality of your product photos. Softbox lighting offers soft, even illumination that highlights your product’s details without harsh shadows or reflections. The key to mastering this technique is to experiment with the size, shape, and placement of the softbox, and combine it with the appropriate camera settings.
Whether you’re shooting small or large items, using one or more softboxes can give you the flexibility and control needed to create professional-quality images that stand out. With practice and fine-tuning, your product photos will look polished, refined, and ready to showcase to the world.
Frequently Asked Questions
1. What is the best size of a softbox for product photography?
For smaller products like jewelry or accessories, a 12 to 24-inch softbox works best. For larger items such as furniture or clothing, opt for a 36-inch or larger softbox to ensure even lighting coverage.
2. How many softboxes should I use for product photography?
Most setups work well with one or two softboxes. A single softbox can serve as your key light, while a second softbox can be used as a fill light to balance shadows. For more advanced setups, you can add a third softbox as a backlight to separate the product from the background.
3. Can I use a softbox for photographing reflective products?
Yes, softbox lighting is highly effective for reflective surfaces, as it provides soft, diffused light that minimizes reflections. You may need to adjust the position of the softbox or use additional diffusion to fully control glare.
4. What camera settings should I use with softbox lighting for product photography?
To achieve sharp, clear product photos, use a low ISO (100-200), a narrow aperture (f/8 to f/16), and a moderate shutter speed (1/60 to 1/125). Adjust the white balance to match the softbox lighting for accurate color representation.
5. How do I reduce shadows when using a softbox?
To reduce shadows, use a fill light opposite your key light, or place reflectors around the product to bounce light back onto it. Adjusting the distance and angle of the softbox can also help soften or eliminate shadows depending on the look you’re going for.