How to Carry Your DSLR Camera Anywhere You Go
As an avid photographer, some of my best shots have come from epic hikes, bike trips across Europe, and backpacking adventures in Asia. But hauling around my bulky DSLR camera and multiple lenses made these active trips a challenge.
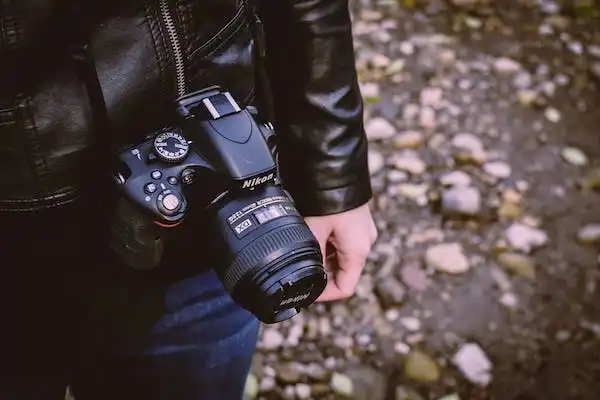
When carrying your DSLR camera, make sure you do it in a padded bag that’s preferably waterproof and has enough room to carry an additional battery, or two.
After plenty of trial and error, I’ve found solutions to comfortably and safely carry my DSLR anywhere. In this article, I’ll share different carrying options for your DSLR and tips for transporting it in various situations.
Picking the Right Carrying Solution for DSLR
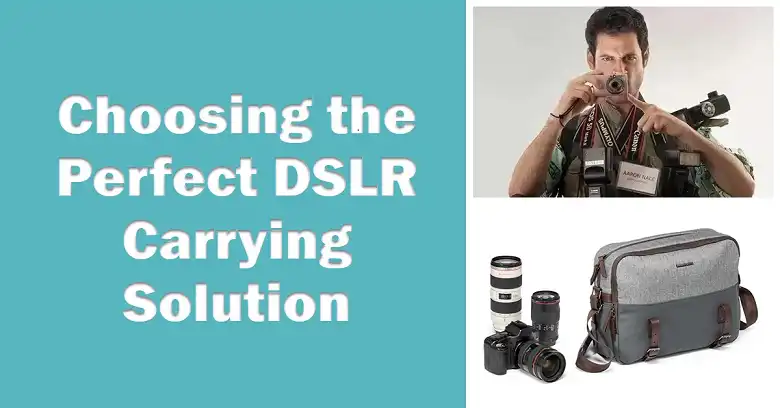
The first step is choosing a method that fits your needs and scenario. Here are the pros and cons of popular DSLR carrying options:
Backpacks
For longer trips and hikes, backpacks let you distribute the camera weight using padded straps and belts. Models designed for cameras have shaped compartments to hold DSLRs and lenses securely, along with plenty of pockets for extras. Look for a backpack with side access that swings to the front so you can grab your camera easily on the trail. Key aspects are size, padded suspension, adjustable straps, tripod carry options, and waterproofing for wet conditions.
Pros: Even weight distribution, secure compartments, plenty of pockets.
Cons: Can be bulky, limited accessibility on the move
Shoulder Bags
Messenger-style shoulder bags work well for day trips without a ton of gear. Their rectangular shape and flap closure make it simple to pull out your camera on the go. Bags come in various sizes and usually fit a DSLR with a lens attached plus some extras. Find one with an adjustable strap, exterior pockets, and interior dividers. The sling design helps stabilize the bag while allowing quick access. Just know that weight on one shoulder can get uncomfortable over time.
Pros: Easy access, good for day trips.
Cons: Weight on one shoulder, limited space.
Sling Bags
Sling bags are versatile for active stuff like bike touring, day hikes, or lighter backpacking. Their single strap lets you swing the bag in front and access gear fast with both hands. Most store a DSLR with a lens, a couple of extra lenses or accessories, a tablet, and personal items. Look for durable, weather-resistant materials, external carry options, and an adjustable stabilizer strap. But slings do have size limits for extended trips.
Pros: Versatile, quick access.
Cons: Limited space for extended trips.
Waist Packs
Waist packs and belt holsters clip around your hips for easy access on hikes and bikes when you need to grab shots on the move. Smaller holsters may only hold a DSLR with a lens. But larger waist packs can also fit extra lenses, batteries, and even a water bottle. Just watch out for extra weight on your hips over long periods. Since waist packs are exposed, they’re also more prone to drops or theft. Using the extra waist strap and buckles helps stabilize the pack and deter pickpocketing.
Pros: Easy access, good for active pursuits.
Cons: Weight on hips, exposed to elements.
Hard Cases
For air travel or demanding situations like desert or marine environments, hard cases provide maximum protection. Opt for lightweight models made of plastic, aluminum, or carbon fiber over heavy steel or wood. Consider a wheeled version if you travel by air a lot. Hard cases latch securely closed and have padded interiors to prevent jostling of delicate camera components. But they do lack the accessibility and portability of soft camera bags. You need to fully unpack each time you switch lenses or grab a spare battery.
Pros: Maximum protection.
Cons: Lack of accessibility and portability.
Carrying Your DSLR in Different Situations
It also helps to assess your needs for certain scenarios beyond general carrying solutions:
Carrying DSLR on a Flight
For air travel, ensure your camera bag follows carry-on size and weight limits, commonly 9 x 14 x 22 inches (22 x 35 x 56 cm) and 15-22 lbs (6.8-10 kg) depending on the airline. Opt for a versatile backpack or messenger bag with removable inserts that can double as a regular carry-on.
- Ensure the bag fits carry-on size limits.
- Pack strategically for security screening.
Strategically pack your gear in the insert, then transfer it to the larger bag at the airport. Since the TSA limits liquids to 3 oz containers, fill your larger bottles at your destination. Be prepared to remove your camera bag during security screening. Some airlines may require gate-checking bags that don’t fit under the seat, so have a cover or plastic bag for protection.
Carrying DSLR on a Bike
For bicycle touring, handlebar bags are convenient. They attach to your front fork for easy DSLR access while riding. Look for quick-release mounting, a transparent upper window, and attachment points to stabilize heavier loads. Frame bags that attach beneath the top tube also allow handy access while pedaling.
- Use handlebar or frame bags for accessibility.
- Consider aerodynamics and stabilization.
For longer rides, bike backpacks let you carry substantial gear without sacrificing aerodynamics. Consider chest and hip straps to center weight and add stabilization. Hard-shell panniers are also great for protecting equipment from dust and moisture over rough terrain.
Carrying DSLR on a Hike
When hiking with a DSLR, comfort and accessibility are key. Seek backpacks with supportive hip belts, moisture-wicking back panels, and waist straps for quick front rotation. If you’re carrying a tripod too, ensure it can fasten securely.
- Prioritize comfort and accessibility.
- Prepare for weather conditions.
For day hikes, a sling bag lets you smoothly swing access to the front when inspiration strikes. Check the weather and pack accordingly – options like waterproof wraps are available for wet conditions. And don’t forget essential extras like spare batteries, filters, and memory cards.
Carrying DSLR with Long Lens
Large pro DSLRs and long telephoto lenses need more heavy-duty carrying solutions. Backpacks help significantly by spreading heavy gear across your hips and shoulders. Find backpacks with deep padded compartments specifically contoured for large DSLR bodies and long lens barrels.
- Use backpacks with specialized compartments.
- Consider rolling hard cases for mobility.
Some long lens bags attach to and extend backpacks too. If you’re also carrying a tripod, choose a pack with specialized straps to lash the lens bag and tripod tightly. Or opt for a rolling hard case, though mobility is restricted.
Carrying DSLR without Bag
It’s risky to carry a DSLR for long without some type of protective bag or case. You may be able to get by briefly for things like a child’s soccer game or city street shots using just a hand or wrist strap along with your camera strap for extra security. There are also minimalist neoprene pouches that slide over the camera.
- Risky without protection.
- Minimalist options are available but not recommended for movement.
But for any situation involving movement or outdoor exposure, having an appropriate camera bag is strongly recommended to prevent damage. With the right carrying solution, you can confidently take your DSLR anywhere.
Additional Tips
While the right camera bag or carrier is key, properly utilizing your gear hauler is equally important. Here are some essential tips for safely transporting a DSLR:
- Pack strategically with dividers and pouches.
- Adjust the harness for proper balance and comfort.
- Prioritize padding and accessibility.
- Secure all closures to prevent bouncing.
- Consider weatherproofing options.
- Bring essential extras in easy-reach pouches.
- Keep weight centered for comfort.
Additional Factors to Consider
Transporting accessories and gear ergonomics require extra planning:
Tripod Transport
Full-size tripods are too big and awkward for standard camera bags. Instead use exterior straps, loops, and lash points on your backpack or case. Some bags have dedicated adjustable tripod systems, while others simply offer a basic exterior pouch. Choose the right solution for your specific tripod.
Comfort and Ergonomics
No matter what solution you choose, always evaluate comfort, especially when hauling gear long distances. Try loading your expected gear and testing the fit and positioning. Take the time to find a bag that works ergonomically with your body to prevent pain or strain. This allows you to fully focus on shooting, not carrying.
Final Thoughts
Getting those amazing shots out on the trails or while traveling requires safely transporting your DSLR camera and gear to each shoot location. Carrying comfort and functionality is way more important than looks or brand. Rather than struggling with a generic shoulder bag lacking camera-specific features, invest time in researching solutions designed expressly for your particular shooting pursuits.
FAQs
How can I carry both a DSLR and tripod comfortably while hiking?
Look for a hiking backpack with integrated straps and bindings along the sides or front to secure your tripod tightly. Carry the head upwards near the top of the pack. Some tripods come with their own specialized carriers that attach under the pack. Position the tripod to balance the weight distribution.
What’s the best way to carry a camera on my bicycle?
For accessibility while riding, a handlebar bag with a see-through upper window allows easy access to your DSLR. If carrying more gear, consider a bike touring backpack with chest and waist straps to stabilize the load while pedaling over variable terrain. Hard-shell panniers are also great for protecting camera equipment from dust and moisture.
Should I carry my DSLR in a plastic bag while hiking in the rain?
Yes, a plastic bag or rain cover can protect your camera from getting wet. But remove your camera to take photos; the plastic can obstruct lens viewing, buttons, and dials. Consider a camera bag or backpack with water-resistant fabric and weatherproof zippers as an alternate solution. Always dry out gear thoroughly before storage after getting it wet.