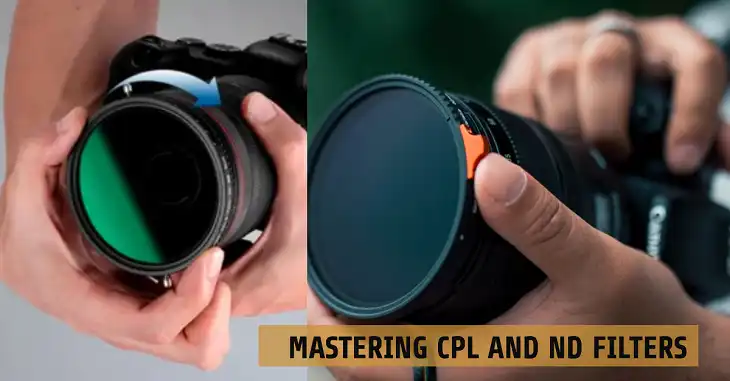
CPL Filter vs ND Filter: When and How to Use Each
When shooting with a camera, photographers often encounter situations where natural light or environmental conditions interfere with their desired results. Filters, attached to the front of a camera lens, help overcome these obstacles. CPL and ND filters are two of the most common choices, but they serve entirely different functions.
CPL filters are best known for reducing glare and reflections while enhancing colors and contrast. On the other hand, ND filters are designed to reduce the amount of light entering the lens, allowing for longer exposures or wider apertures in bright conditions. Understanding when and how to use each is key to producing high-quality images.
What is a CPL Filter?
A Circular Polarizing (CPL) filter is a specialized filter that reduces reflections and glare from reflective surfaces such as water, glass, or wet foliage. This allows photographers to capture more natural-looking images with richer colors and improved contrast.
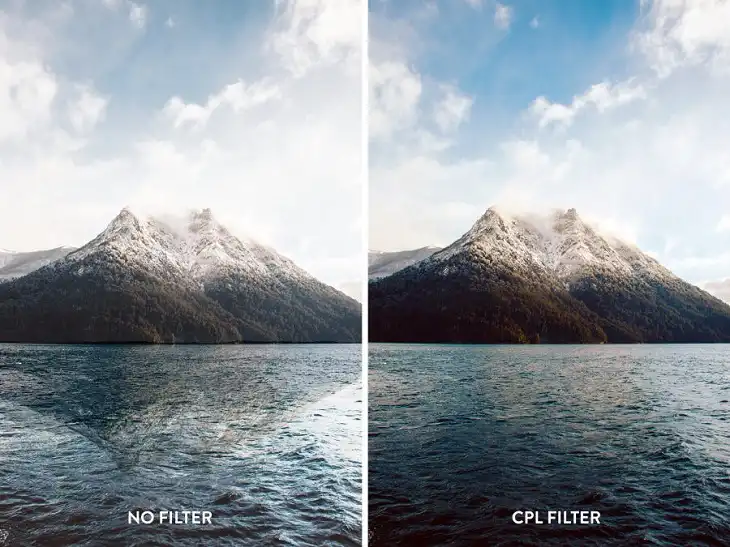
Image: with and without CPL filter
How CPL Filters Work
CPL filters work by interacting with polarized light waves. When light reflects off a surface, it becomes polarized, meaning that its waves align in a particular direction. The CPL filter, when rotated, filters out specific polarized light waves, allowing the photographer to control how much reflection or glare is present in the final image.
For instance, rotating a CPL filter on a sunny day can darken the sky, making the blue more pronounced while minimizing the reflection on a body of water.
Effects on Images
One of the most sought-after features of CPL filters is their ability to reduce reflections. Whether you’re photographing a lake or trying to capture a landscape through a glass window, a CPL filter can help eliminate those unwanted glares that would otherwise distract from the subject.
In addition to reducing reflections, CPL filters also enhance colors, especially blues and greens. The filter deepens the blues of the sky and brings out the vibrant greens of trees, grass, or foliage, giving the overall image a more saturated look.
Ideal Situations for Using CPL Filters
CPL filters are ideal for outdoor photography, particularly landscapes and nature scenes. They are most effective on sunny days, where reflections and excessive light can wash out an image. Additionally, CPL filters are commonly used for photographing scenes through glass or bodies of water, where reflections would normally distort the image.
However, it’s essential to note that CPL filters should be avoided in low-light environments, as they reduce the amount of light reaching the sensor, making it more difficult to capture a well-exposed image.
Technical Considerations
A key aspect of CPL filters is that they come in both linear and circular variations. Most modern cameras with autofocus systems require circular polarizers to function properly. Linear polarizers can interfere with autofocus and metering, making them less compatible with today’s camera technologies.
Another technical factor to consider is the strength of the CPL effect, which is determined by rotating the filter. The more the filter is rotated, the stronger the polarizing effect, although this also results in some image darkening. Typically, a CPL filter reduces light by about one to two stops.
Limitations and Drawbacks
While CPL filters are immensely useful, they do have some drawbacks. Since they reduce the amount of light entering the camera, they can make images slightly darker. Additionally, their effects are most noticeable when shooting at a 90-degree angle to the sun, meaning their effectiveness diminishes when shooting directly into or away from the sun. Furthermore, CPL filters are less effective on metal surfaces, as these don’t reflect polarized light.
What is an ND Filter?
A Neutral Density (ND) filter is a lens filter designed to reduce the amount of light entering the camera without affecting the color balance. This allows photographers to use slower shutter speeds or wider apertures, even in bright light, to achieve certain creative effects, such as motion blur or shallow depth of field.
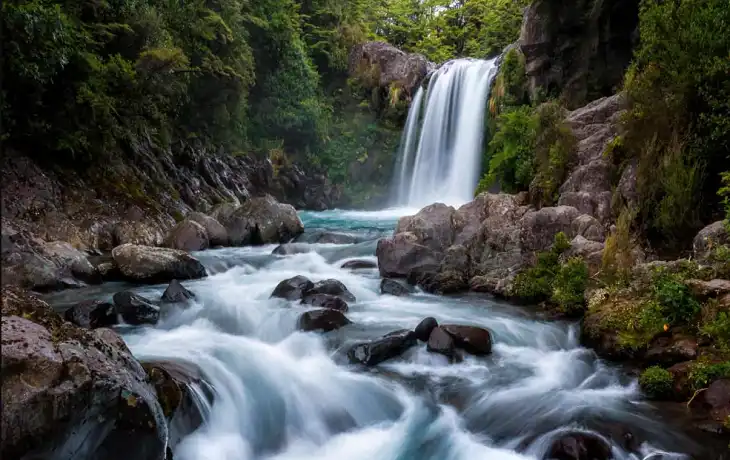
Image: long-exposure waterfall picture with ND filter
How ND Filters Work
ND filters work by cutting down the amount of light that passes through the lens. They do so evenly across all wavelengths of light, which is why they don’t alter the color of the image. ND filters are rated in terms of “stops,” which indicate the degree of light reduction. For example, an ND2 filter reduces light by 1 stop, cutting the light entering the lens in half, while an ND8 filter reduces light by 3 stops, allowing only 1/8th of the light through.
Types of ND Filters
There are three main types of ND filters:
- Standard ND Filters: These filters have a fixed density and reduce light by a set number of stops.
- Graduated ND Filters: These have a gradual transition between clear and dark, allowing photographers to darken a specific part of the scene (such as the sky) while keeping the foreground properly exposed.
- Variable ND Filters: These allow for adjustable light reduction, usually between 2 and 8 stops, offering flexibility but often at the cost of some image quality.
Effects on Images
ND filters primarily allow for slower shutter speeds in bright conditions. For example, when photographing a waterfall in daylight, an ND filter lets you slow down the shutter speed, creating a silky-smooth water effect. Similarly, in portrait photography, an ND filter can enable the use of wide apertures, resulting in a beautifully blurred background even under bright sunlight.
Ideal Situations for Using ND Filters
ND filters are essential for long-exposure photography, such as capturing the movement of water, clouds, or even car light trails at night. They are also useful when shooting wide-open (with a shallow depth of field) in bright light, where without the filter, the image would be overexposed.
Technical Considerations
When choosing an ND filter, it’s essential to consider the strength or “stop” level. The higher the stop, the more light it blocks. Here’s a quick table to demonstrate light reduction at various stop levels:
| ND Filter Strength | Light Reduction (Stops) | Percentage of Light Blocked |
| ND2 | 1 stop | 50% |
| ND4 | 2 stops | 75% |
| ND8 | 3 stops | 87.5% |
| ND16 | 4 stops | 93.75% |
| ND32 | 5 stops | 96.875% |
Limitations and Drawbacks
One of the challenges of using an ND filter is that it can make it difficult to compose and focus your shot, particularly with stronger filters, as they darken the viewfinder significantly. Another drawback is that variable ND filters, while versatile, can sometimes introduce vignetting or uneven exposure when used at extreme settings.
Key Differences Between CPL and ND Filters
While both CPL and ND filters attach to the front of the lens, their functions are quite different. A CPL filter is used primarily to reduce reflections and enhance colors, whereas an ND filter controls the amount of light entering the lens.
- Primary Function: A CPL filter reduces glare and enhances colors, while an ND filter reduces the light entering the lens.
- Effect on Exposure: A CPL filter slightly darkens the image, but an ND filter significantly reduces exposure, depending on its strength.
- Impact on Color: CPL filters enhance color contrast, making skies bluer and foliage greener. ND filters, by contrast, maintain a neutral color balance.
- Versatility: CPL filters are more commonly used in outdoor and reflective scenes, while ND filters are ideal for controlling light in bright conditions or creating long-exposure effects.
When to Use CPL vs ND Filters
Knowing when to use a CPL versus an ND filter can dramatically improve your photography.
In landscape photography, CPL filters are great for reducing reflections on water or making the sky pop, whereas ND filters help create beautiful long-exposure shots of waterfalls or moving clouds. In architectural photography, CPL filters eliminate reflections from windows, while ND filters allow for more creative long-exposure compositions, even during the day.
For water and seascape photography, combining both filters can be incredibly effective—using a CPL to reduce surface glare and an ND filter to achieve a smooth, flowing water effect. In portrait or street photography, an ND filter helps control exposure and maintain a shallow depth of field in bright sunlight, while a CPL can boost contrast in urban scenes.
Can CPL and ND Filters Be Used Together?
Yes, CPL and ND filters can be stacked together for even more creative control. Combining them can be especially useful when photographing reflective surfaces in bright conditions while also needing to control exposure. However, there are some potential downsides to stacking filters. Doing so increases the risk of vignetting (dark corners in your image) and can introduce issues such as flares or ghosting if low-quality filters are used.
The best practice when combining filters is to attach the ND filter first, then the CPL on top, as this allows for easier adjustment of the polarizing effect. Thin-profile filters are recommended to reduce the likelihood of vignetting.
Selecting between a CPL and an ND filter depends largely on your photography style and the type of scenes you shoot. If you frequently photograph landscapes or outdoor scenes with reflections, a CPL filter is a must-have. If you’re more interested in long-exposure photography, like waterfalls, seascapes, or night scenes, an ND filter is indispensable.
Wrapping Up
Both CPL and ND filters are valuable tools that allow photographers to take greater control over their images. Whether you want to reduce reflections, enhance colors, or capture stunning long-exposure shots, understanding when and how to use each filter can elevate your photography to new heights. By mastering the use of CPL and ND filters, you open up a world of creative possibilities, enabling you to tackle challenging lighting conditions with ease.