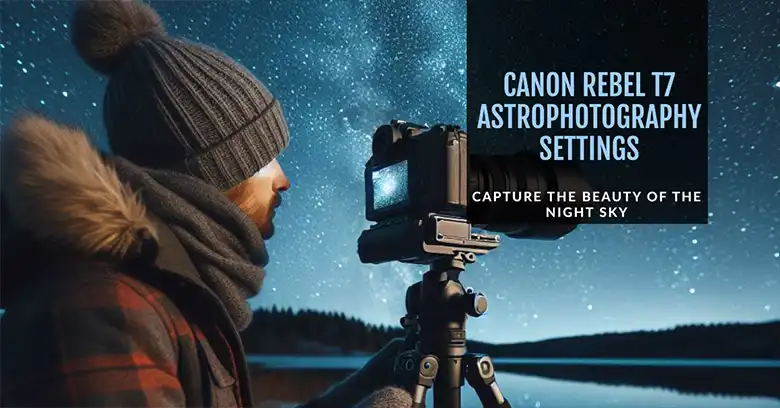
Canon Rebel T7 Astrophotography Settings
Shooting the Milky Way with your Rebel T7 is a blast, but getting those settings just right can be tricky. Don’t worry though, I got you covered! As an astrophotography addict myself, I’ve spent countless nights tweaking my T7 to capture those pinpoint stars and swirling galactic clouds. The key is nailing the exposure triangle – ISO, aperture, and shutter speed. But there are also some other crucial tips and tricks you’ll want to know. So let me guide you through dialing in the perfect astrophotography settings. By the end, you’ll be ready to immortalize the cosmos!
Customization in Your Rebel T7 for the Milkyway Photoshoot
With a basic camera setting, you won’t be able to do astrography. To get a proper Milky Way photo, you will need to customize the T7’s settings. Here I have shared the settings that I follow while doing Astrography. Here are the adjustments that you will need to make –
ISO
For astrophotography, since we’re dealing with low-light conditions, we need to set the ISO properly. This will boost the camera’s sensitivity, allowing it to capture more details of the night sky, including the faint stars and wispy nebulae.
However, there’s a catch. While a higher ISO increases light sensitivity, it also introduces digital noise, which can manifest as unwanted grain in your photos. The sweet spot for your Rebel T7 typically lies between ISO 800 and ISO 3200. Experiment within this range to find the balance between capturing enough light and minimizing noise. Remember, you can always tweak the settings in post-processing software to further reduce noise later.
Aperture
Aperture refers to the opening of your lens, and it plays a crucial role in controlling the amount of light that reaches the camera sensor. Think of it like the pupil of your eye – the wider it opens, the more light enters. For astrophotography, we want to maximize light intake, so set your lens to its widest aperture. On your Rebel T7’s standard 18-55mm kit lens, the widest aperture is f/3.5. The wider the aperture, the lower the f-number, so aim for the lowest f-number possible on your lens.
By opening your lens wide, you’re essentially allowing more starlight to flood the sensor, resulting in a brighter and more detailed image. It’s like opening the curtains in a dark room – suddenly, everything becomes clearer!
Shutter Speed
Here’s where things get interesting – shutter speed determines how long the camera sensor is exposed to light. For astrophotography, we need longer exposures to capture the faint light of stars and celestial objects. But there’s a trade-off: the Earth rotates, and as it does, the stars appear to move across the sky. If your shutter speed is too slow, those stars will leave trails instead of appearing as sharp points of light.
Here’s a handy rule of thumb called the “500 rule” to help you determine the maximum shutter speed before stars start to streak: divide 500 by your focal length (in millimeters). Let’s say you’re shooting wide with your 18mm kit lens: 500 divided by 18 gives you approximately 28 seconds. This means that with a 28-second exposure, you should still get relatively sharp stars. Remember, this is a rule of thumb, and you might need to adjust it slightly based on your specific camera and lens combination.
Here’s a quick cheat sheet for different focal lengths on your Rebel T7:
- 10mm at 25 seconds
- 16mm at 20 seconds
- 22mm at 15 seconds
Pro Tip: As a beginner, it’s always better to err on the side of shorter exposures. You can always take multiple shorter exposures and stack them later in post-processing software to achieve a similar effect as a single long exposure. This technique also helps reduce noise.
Focus
Since astrophotography involves focusing on distant objects with minimal light, autofocus might not be your best friend. To achieve pinpoint-sharp stars, switch to manual focus and use Live View. Here’s how:
- Set your lens to manual focus mode.
- Activate Live View on your Rebel T7. This allows you to see a magnified preview of the scene on your camera’s LCD screen.
- Zoom in on a bright star using the magnification function on your Live View.
- Gently adjust the focus ring on your lens until the star appears as a tiny, crisp dot.
- Once you’ve achieved sharp focus, lock it in by half-pressing the shutter button without taking a picture. This will prevent the camera from refocusing accidentally when you start your actual exposure.
White Balance
White balance ensures that the colors in your image appear natural. Under ideal dark sky conditions, setting the white balance to “Daylight” should work well. However, if you’re battling light pollution from nearby towns or cities, you might need to experiment with a custom white balance setting. This can be done by taking a white balance reference shot under similar lighting conditions to where you’ll be photographing the night sky.
Here’s a crucial point to remember: white balance adjustments can be made later during post-processing with more control and flexibility. So, don’t stress too much about getting it perfect in-camera, especially when dealing with the complexities of astrophotography lighting.
Drive Mode
Your camera’s drive mode determines how many pictures are taken with a single press of the shutter button. For astrophotography, where we’re dealing with long exposures and minimizing camera shake is crucial, set the drive mode to “Single Shot.” This ensures that only one image is captured each time you press the shutter button.
Noise Reduction
Modern cameras come with built-in noise reduction features. While this might seem helpful at first glance, for astrophotography involving long exposures, it’s best to turn noise reduction off. Here’s why:
Long exposure noise reduction works by taking a second image at the same shutter speed as your main exposure, but with the shutter closed. This additional image captures the noise pattern generated by the camera sensor itself. The camera then subtracts this noise pattern from your main image to reduce overall noise.
The problem? This whole process essentially doubles your exposure time. Since we’re already pushing the limits with long exposures to capture enough light, losing precious shooting time due to noise reduction isn’t ideal. You can always address noise reduction later in post-processing software with more control and precision.
Additional Tips for Astrophotography Success with Your Rebel T7
While camera settings are essential, there’s more to capturing stunning astrophotography images than just technical know-how. Here are some additional tips to elevate your nightscape photography:
Self-Timer or Remote Release
Even the slightest camera shake can ruin your long-exposure astrophotography shots. To minimize any camera shake caused by pressing the shutter button, utilize the self-timer function on your Rebel T7 or invest in a remote release cable. This allows you to trigger the shutter release without physically touching the camera, ensuring a vibration-free exposure.
Mirror Lock-Up
This feature is particularly helpful for long-exposure astrophotography, especially when using a telephoto lens. When you press the shutter button on your Rebel T7, the mirror inside the camera flips up briefly before the shutter opens to capture the image. This movement can cause slight vibrations, potentially blurring your stars.
Mirror lock-up allows you to pre-raise the mirror with a dedicated button or menu setting on your camera. This way, any vibrations caused by the mirror movement are isolated and occur before the actual exposure begins, resulting in sharper images.
Remember: Mirror lock-up isn’t always necessary, especially for shorter exposures or when using wide-angle lenses. However, if you’re experimenting with long exposures and a telephoto lens, it’s worth giving it a try.
Location
Light pollution is the enemy of astrophotography. The more artificial light there is around you, the dimmer the stars will appear. To capture the Milky Way and other celestial wonders in all their glory, seek out dark locations away from city lights. Ideally, look for areas with a Bortle Dark Sky Site rating of Class 1 (exceptionally dark) or Class 2 (faintly luminous sky).
A quick online search can help you find dark-sky locations near you. Remember, the darker the environment, the more stars you’ll be able to capture in your images.
Tripod
Astrophotography involves long exposures, and any camera movement during the exposure will result in blurry stars. To ensure sharp images, a sturdy tripod is an absolute must. Invest in a good-quality tripod that can hold your camera and lens securely, even in windy conditions.
Pro Tip: If you’re just starting out and don’t want to invest in a tripod yet, you can improvise by finding a stable, elevated surface like a park bench or picnic
Image Format
When capturing astrophotography images, ditch the JPEG format and shoot in RAW. RAW files contain all the uncompressed data captured by your camera’s sensor, offering much more flexibility and control during post-processing compared to compressed JPEGs. This allows you to adjust aspects like white balance, noise reduction, and exposure with greater precision, ultimately leading to more stunning final images.
Stacking Techniques
This stacking process helps reduce noise in your images by averaging out the random noise patterns that appear in each individual exposure. Additionally, stacking can also improve the signal-to-noise ratio, essentially amplifying the faint details of stars and nebulae.
There are different stacking techniques available, but for astrophotography with your Rebel T7, focus stacking and median stacking are popular choices. Focus stacking is particularly useful for achieving sharp stars across the entire image, especially when using wide-angle lenses where achieving perfect focus from foreground to background in a single exposure can be challenging.
While stacking might sound complicated, there’s a plethora of user-friendly astrophotography software available that can guide you through the process. With a little practice, you’ll be stacking your images like a pro and unlocking the full potential of your nightscape photography.
End Notes
At the end of the day, astrophotography is all about patience, practice, and having fun under the night sky. Don’t get discouraged if your first attempts don’t turn out perfect. It takes time to really master this craft. But trust me, when you nail that first amazing shot of the Milky Way, it makes all the effort worthwhile. So get out there, keep experimenting, and most importantly, enjoy the journey. The universe is your canvas – I can’t wait to see the masterpieces you create with that little Rebel T7! Feel free to hit me up anytime with questions.

